|
|
|
Categories
|
|
Information
|
|
Featured Product
|
|
|
 |
|
|
There are currently no product reviews.
 ;
More than pleased with my prurchase, very good product for the price.
;
Manual-link came 30 minutes after having paid for an extremely rare (40 years old) item (sony icr-120) and helped me to get the radio rework again. So really good help for me, fast and reliable delivery and -taken that into consideration- a very reasonable price for that service. So thanks again! Mike, Germany
 ;
Some of the pictures in this manual are a bit irritating. I had to dissassemble the unit and some of the screws have different threads, which is not mentioned in this manual. Also some of the drawings of the boards look different than the actual boards.
After all, the manual was very useful. I was able to recalibrate the capstan drive and it is working fine again.
;
This manual is very good. 303 pages scanned in a very high resolution. My camera has bad, leaking capacitors which all of the V5000 models are suffering from these days.
There is a huge part list with all capacitors, transistors etc. in this manual which helped me a lot. Otherwise I would not have been able to buy replacement parts.
The dissassembly guide is very enormous and detailed. Unlike on the Panasonic MS1 manual I downloaded here it actually looks like the real parts look. And the screws are labeled correctly, so you shouldn't have any left after the repair. ;)
;
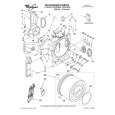
has all the schematics you could need,and very well laid out format also has all part numbers along with an exploded view which is helpful
Alignment Instructions
2. SCREEN
SVC v0 R BIAS G BIAS B BIAS R DRIVE G DRIVE B DRIVE V. CENTER V. SIZE H. CENTER VCO VCO FIN VCO-L VCO-L FIN AGC LED EAST Pr 159 136 127 35 31 32 10 23 28 07 107 05 113 NO 44 01 1) Receive the Retma pattern and heat run over 15minutes. 2) Adjust the � G BIAS, R, G DRIVE�to 0, � BIAS�to R, B 127, � DRIVE�to 32. B Adjust the screen volume that the Retma pattern reachs the cut-off point.
ENTER SERVICE MODE
1. Select the Pr 91. 2. Adjust �Sparpness �to 0. 3. Enter the service mode using the follow keys. R G MENU.
3. WHITE BALANCE
1) Receive the Full white pattern and heat run over 15minutes. 2) Adjust the picture control at the point � value of white X� balance instrument in 20cd/m 3) Enter the service mode. 4) Adjust � BIAS, G BIAS�to x=288, y=301. R 5) In order to exit the service mode power off the TV set and power on. 6) Set the TV set to � Normal I�mode(20/21 inch) or set to � Normal II�mode(14 inch) 7) Enter the service mode. 8) Adjust � DRIVE, G DRIVE�to x=288, y=301. R 9) Repeat above process until the white balance value to x=288, y=301, X=20, x=288, y=301, X=200 (approximate) in 2) -8).
1. AFT
1) Set a signal Generator with - RF FREQUENCY = 38.9MHz, 34.2MHz (L� ) - RF OUTPUT LEVEL = 80+/-5dBuV - System = PAL for 38.9MHz. SECAM-I for 43.2MHz. 2) Connect the Signal Generator RF Output (PAL 38.9MHz) to P101 (Tuner IF Output). There must be no signal input to the tuner. 3) Locate the cusor to � VCO�in Service Mode Menu, then press the � +�key and wait until the Vol � Please wait�disappear on the TV screen. 4) Connect the Signal Generator RF Output (SECAM-L 34.2MHz) to P101 (Tuner IF Output). 5) Locate the cusor to � VCO-L�in Service Mode Menu, then press the � +�key and wait until the Vol � Please wait�disappear on the TV screen.
4. FOCUS
1) Apply a RETMA PATTERN signal. 2) Adjust the Focus Volume on FBT to obtain optimal resolution.
5. AGC
1) Set a pattern Generator with - RF LEVEL = 60dBuV - 100% FULL COLOR BAR 2) Connect the Pattern Genetator RF Output to tuner RF input. 3) Connect the probe of oscilloscope in AGC pin of tuner. 4) Adjust the AGC point to MAX - 1V. ( Simple Method ) 1) Receive the pattern. 2) Locate the cusor in � AGC�and adjust using the � VOL +�or � VOL -�keys. 3) Adjust the point there is no noise in about 60dBuV and no beat in about 90dBuV.
|
|
|
> |
|