|
|
|
Categories
|
|
Information
|
|
Featured Product
|
|
|
 |
|
|
There are currently no product reviews.
 ;
Good copy, clear and has all necessary information. Very happy with the purchase
 ;
buen manual con sus formas de onda y esquemas , completo y de buena calidad de imagen, es correcto.
;
This is exactly what I needed This was a hard one to find and I had already downloaded several for other Panasonic radios but none matched my radio.
Although my radio is the LBE model the LBS is the same.
A very good quality manual with every thing you should get in it
;
el manual es correcto , completo y de buena calidad aunque algun esquema esta excesivamente diseccionado.
;
muy buen manual con multiples graficos y formas de onda ademas de muy completo y bien presentado.
1
2
3
4
8. EACH SETTING AND ADJUSTMENT
8.1 ADJUSTMENT
A
There is no information to be shown in this chapter.
8.2 RE-WRITE FOR DVD FIRMWARE
1. Purpose
After replacing the DVD MT PCB Assy, be sure to update the firmware to the latest version. The firmware of the Assy for service may not be the latest.
2. Procedures for creating the disc for updating
B
Necessary tools: 1 PC with a CD-R/CD-RW drive 2 Blank CD-R or CD-RW 3 Firmware file (�����.BIN) How to create: 1 Start up the program for writing to CD. 2 Load a blank disc in the CD-R/CD-RW drive. 3 Enter "PIONEER" as the volume label. 4 Select the .BIN file. 5 Write the latest version of the firmware in ISO 9660 format.
C
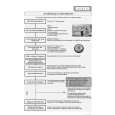
3. Procedures for updating the firmware
How to update: 1 Turn on the main unit and open the disc tray. 2 Place the disc for updating in the disc tray and close the tray. 3 Press the PLAY button.
While the screen shown at left is being displayed, updating is in progress. DO NOT TURN OFF THE POWER DURING UPDATING.
D
4 Updating of the firmware is completed.
When the screen with the Pioneer logo is displayed, updating is completed. The time required for updating is about 2 minutes.
E
F
38
1 2
DV-300-K
3 4
|
|
|
> |
|