|
There are currently no product reviews.
 ;
This is the 2nd time I download manuals from this website and I can say it's what I was expecting. It contains schematic, layout (decent quality), short description, parts and dissasembly instructions. I recomend it for anyone who wants to repair/modify this device.
;
Very useful Service Manual! With it I was able to identify the damaged pots in my old amplifier, purchase the adequate replacements and make myself the repair.
I have again my old amplifier, still a very good one that I will keep for as many years as I can!
Thanks to Owner Manuals!
;
Good price for the manual and easy to locate on the site and download. Plus, just like the original. Thanks a lot.
;
Genuine Service Manual. Link was available in less then an hour or so. Service Manual contains assembly, PCB layout, complete circuit diagram, Components list etc
;
Great and very well scanned Service Manual, also very fast download - Recomended !
5
6
7
8
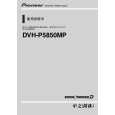
- Removing the pickup unit (Fig. 4)
1. Remove the module pc board in accordance with the procedure of "Removing the module pc board.� 2. While holding the pickup case, remove the skew screw (main). 3. Lifting the end of the pickup rack, slide the main shaft, and remove the pickup unit. Notes: Replacing the pickup unit requires the skew adjustment. Remove glue from both ends of the main and sub shafts, and skew stud. Do not reuse the old skew screw. Be sure to use a brand-new skew screw supplied with a new pickup unit. Fix the skew screw with glue (GYL1001) after adjustment.
A
B
Skew screw (main)
Skew screw Pickup unit Sub shaft
C
Skew screw
Fig. 4
D
E
F
CX-3078
5 6 7 8
19
|