|
|
|
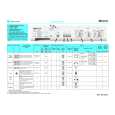
Categories
|
|
Information
|
|
Featured Product
|
|
|
 |
|
|
There are currently no product reviews.
 ;
excellent value & price! Includes everything you need to know about the NN-C777! I would buy this again.
;
Very satisfied! I was searching for several days, but nope; till I discovered your webside and there it was at a very reasonable price. Keep up the good work!
Paul
Flanders
 ;
Generally speaking good copy; a few pages too hard contrast...
Good service and communication.
;
I purchased the unit from a private party and the original owners manual was not available. Having the ability to download it was extremely helpful and clarified operating the equipment immensely. This is a complicated unit and without the manual I would not have been able to maximize it's potential. Thank you.
;
Being a user of older radios of many kinds, preferring them over more modern rigs, this manual was invaluable in the programming of my two. I now know for certain what the assorted buttons functions are, and am very grateful to have found this excellent site. Many thanks for your assistance, Tony.
Video Connections
This player features S-video and composite video output possibilities. Check the manual supplied with your TV or monitor to determine the best possible connection for your system. In addition to making physical connections to your TV or monitor, it is also necessary to assign the TV screen size. You can use the [Setup Navigator] in the Setup screen General to set whether you are using a wide screen or standard size TV or monitor (page 20). Additionally, you can use the [TV Screen] setting in the Setup screen Video menu (page 29).
TV SYSTEM switch (except for DVD-V550)
Video output changes as follows according to the playback disc�s recorded format. NTSC = PAL, PAL = NTSC conversion is possible on Super VCDs/Video CDs. PAL = NTSC conversion is not possible on DVDs. When the TV SYSTEM switch is set to the AUTO position, the disc�s format will be output as is. When a CD or disc is not loaded, the previous video output format will be selected.
Disc Type Format Output format Position of TV SYSTEM switch NTSC PAL AUTO NTSC MOD. PAL PAL NTSC NTSC NTSC MOD. PAL PAL PAL NTSC PAL NTSC PAL NTSC or PAL
DVD
NTSC PAL
S-VIDEO OUT
� Make S-video connections to a TV or monitor with Svideo input to produce a high quality video image. � Use an S-video cable (not supplied) to connect the output on the player to S-video input on the TV or monitor.
Super VCD/ NTSC Video CD CD, No disc PAL
TV or monitor
About MOD. (Modulation) PAL
� SHRINK Most models of the newly developed countdown PAL TV system detect 50 Hz (PAL)/60 Hz (NTSC) and automatically switch vertical amplitude, resulting in a display without vertical shrinkage. � If your PAL TV does not have a V-Hold control, you may not be able to view NTSC disc because the picture may roll. If the TV has a V-Hold control, adjust it until the picture stops rolling. On some TVs, the picture may shrink vertically, leaving black bands at the top and bottom of the screen. This is not a malfunction; it is caused by the NTSC = PAL conversion.
S-VIDEO OUT
S-VIDEO IN
System Control Connections
VIDEO OUT
� Make composite video connections to a standard TV or monitor with a video input jack. � Use the supplied video cable to connect the video output jack on the player to the video input on the TV or monitor. � Be sure to match the color of the plug with the color of the jack (yellow).
TV or monitor
Using a commercially available cord with a mini plug (3.5 mm dia. with no resistance) to connect this player�s CONTROL IN jack to the CONTROL OUT jack of another PIONEER component bearing the � mark, you can control the player as though it were a component in a system (system control). � If you connect for system control, you cannot operate the player directly. Point the remote control unit at the component (AV amplifier, etc.) connected to the CONTROL OUT jack to operate. � When controlling as a system, be sure to make a connection to the amplifier using an audio or video cord, even when using only digital components. � For details, refer to the operation manuals of the connected components.
Pioneer component with � mark.
VIDEO OUT
VIDEO IN
CONTROL
CONTROL
IN
OUT
18
|
|
|
> |
|