|
|
|
Categories
|
|
Information
|
|
Featured Product
|
|
|
 |
|
|
There are currently no product reviews.
 ;
Up to now you are the BEST! Prompt-efficient and so reasonable ! I have been after SONY service manual for quite some time !Thank you very much ! I can recomend your service to
all my collegagues ! V.Bergfield .
;
This is a very good quality print (scan) of the original SONY service manual. The original from Sony is on very thin paper. Nevertheless it is very clear and sharp and excellent readable. I'm very satisfied to have now this rare document. I've looking for it many years (infrequent). It contains very detailed circuit diagrams, exploded views, part lists, PCB view with good readable connection lines. Very recommended.
;
A complete manual with all the needed details of calibrations and service instructions about the radio receiver.
A big deal.
Many thanks !
;
Fast delivery and good quality copy. To be recommended
;
Excellent product, very clear print. Detailed circuit and assembly diagrams - this enabled me to repair my CD player with confidence. I highly recommend this site.
6-4.
DRIVE AUTO ADJUSTMENT
1.
DVD-SL (single layer)
On the Test Mode Menu screen, press [1] key on the remote commander, and the drive auto adjustment menu will be displayed.
## Drive Auto Adjustment ## Adjustment Menu 0. 1. 2. 3. ALL DVD-SL CD DVD-DL
Select [1], insert DVD single layer disc, and press [ENTER] key, and the adjustment will be made through the following steps, then adjusted values will be written to the EEPROM. DVD Single Layer Disc Adjustment Steps 1. SLED TILT Reset 2. Disc Check Memory SL 3. Wait 300 msec 4. 5. 6. 7. 8. 9. 10. 11. 12. 13. 14. Set Disc Type SL LD ON Spdl Start Wait 1 sec Focus Servo ON 0 Auto Track Offset Adjust CLVA ON Wait 500 msec Tracking ON Wait 1 sec Sled ON
4. SACD
Exit: RETURN
Normally, [0] is selected to adjust DVD (single layer), CD, DVD (dual layer), and SACD in this order. But, individual items can be adjusted for the case where adjustment is suspended due to an error. In this mode, the adjustment can be made easily through the operation following the message displayed on the screen. The disc used for adjustment must be the one specified for adjustment. However, for SACD disc, use the player with initial data if the disc is not available.
15. Check CLV Lock 16. Auto LFO Adjust 17. Auto Focus Offset Adjust 18. Auto Tilt Position Adjust 19. Auto Focus Gain Adjust 20. Auto Focus Offset Adjust 21. EQ Boost Adjust 22. 23. 24. 25. 26. 27. Auto LFO Adjust Auto Track Gain Adjust, Search Check 32Tj Fwd 32Tj Rev 500Tj Fwd 500Tj Rev
0.
ALL
Select [0] and press [ENTER] key, and the servo set data in EEPROM will be initialized. Then, 1. DVD-SL disc, 2. CD disc, 3. DVD-DL disc, and 4. SACD disc are adjusted in this order. Each time one disc was adjusted, it is ejected. Replace it with the specified disc following the message. Though the message to confirm whether discs other than SACD disc are adjusted is not displayed, you can finish the adjustment if pressing the [STOP] button. During adjustment of each disc, the measurement for disc type judgment is made. As automatic adjustment does not judge the disc type unlike conventional models, take care not to insert wrong type discs. Also, do not give a shock during adjustment.
28. All Servo Stop 29. Eep Copy Loop Filter Offset
6-5
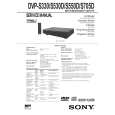 $4.99 DVPS330 SONY
Owner's Manual Complete owner's manual in digital format. The manual will be available for download as PDF file aft…
|
|
|
> |
|