|
|
|
Categories
|
|
Information
|
|
Featured Product
|
|
|
 |
|
|
There are currently no product reviews.
 ;
This service manual of the old video cassette recorder VT-LC50EM is very good readable even the tiniest numbers (i.e. IC-pins). The circuits are very clear. Many details of the schematic are very good described but in GERMAN language. Many schematic details - but complete at all. Common background information of several details are enclosed and physical knowledge of the TFT liquid crystal display for example. The manual lacks PCB drawings. If you understand german I would recommend this manual for you.
;
Hi, this is a very clear manual, nice copy, not quite up to the standard of the very best available but better than many others. I think the price was especially fair for a hard to find manual and I would certainly use this manual seller again. Recommended.
 ;
This schema available for me in good condition. I would highly recommend.
;
Thanks for this "hard to find" service manual.
I apreciate the good quality of scanning and the pages scanned in A3 format.
;
Helpd me mont a new carradio when prewius mont was a mess.
1
2
3
4
7.1.5 DISASSEMBLY
A
1 Tray Lens Assy
2 Top Cover
1 2 3
Power ON. Tray Open (0). Remove the Tray Lens Assy.
1 2
Remove two screws of the Rear Panel. Remove the Top Cover with pull up.
Top Cover
2
1
�2
B
Tray
3
C
2
Tray Lens Assy
2
1
3 Stay
How to Open the Tray by Manual Operating
In the reverse state, release the Sheet, turn the Drive Gear of the Loading Mechanism Assy to the direction of counterclockwise. If the Tray moved toward the front about 2 or 3 cm, pull out the Tray by hands. When disc is put in the Tray, be careful to come off the disc when clamp was released.
D
1 2 3 4 5 6
Remove the L Plate (Screw �1) Remove seven screws of the Stay. Remove the Flexible Cable (17P) from CN3 of the SSIB Assy. Remove three screws of the DVDM Assy. Release the Anti-dust Sheet. Remove the Stay. DVDM Assy
2 4
Driver (Small) Stay
�2
Flexible Cable (17P) 1 L Plate
2 2 4 6 3 2
CN3
2
E
Drive Gear
2 5
Tray is Open Anti-dust Sheet
F
1
SSIB Assy
66
1 2
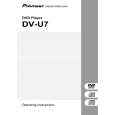
DV-U7
3 4
|
|
|
> |
|