|
|
|
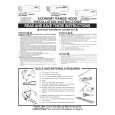
Categories
|
|
Information
|
|
Featured Product
|
|
|
 |
|
|
There are currently no product reviews.
 ;
The manual is useful for trouble shooting for an old instrument. It saved money,and let me enjoy DIY.
 ;
Perfect source of information for replacing the HDD and performing general diagnostics.
;
Perfect source of information for replacing the HDD and performing general diagnostics.
;
Very good scanned copies. Quick response and reasonable price. Thanks for service!
;
Good. Good. Good. Good. Good. Good. Good. Good. Good. Good. Good. Good. Good. Good.
Note: Perform the operation in numerical order.
User's unit Operation 1 While pushing down RESET button, press then release RESET button. 4 Press BE�R�S . Display T? (Unit emits a buzz.)
Back up unit Operation 2 While pushing down RESET button, press then release RESET button. 3 Press BE�R�S . Display R? (Unit emits a buzz.)
T? (Unit emits a buzz.) OK
R? (Unit emits a buzz.) OK
5 After the data transmission.... It takes a few minutes to complete the data transfer.
6 When the data is transferred properly...... In case the data transfer ends incomplete......
MINDENT T�R�L?
7 Press RESET button. 9 Press BE . Note: Never press BE�R�S as it deletes all the data. A Press BE (OFF).
MINDENT T�R�L? N�V?
8 Press RESET button. 0 Press BE . Note: Never press BE�R�S as it deletes all the data. B Press BE (OFF).
MINDENT T�R�L? N�V?
4. TROUBLESHOOTING
Before doing the following solutions, save data if possible.
SYMPTOM No power
CAUSE Weak battery Poor soldering of the power supply circuit
SOLUTION Replace batteries Resolder
No display at all or wrong display
Defective heat seal Defective LCD
Replace the heat seal Replace the LCD
�7�
|
|
|
> |
|