|
|
|
Categories
|
|
Information
|
|
Featured Product
|
|
|
 |
|
|
There are currently no product reviews.
 ;
Print was clear and easy to read. Thank you Joe joeoldaudio
;
Very great deal. In a few minutes a have the manual, that I needed. Thanl you very much
;
Manual was complete. Received it quickly. No problems
;
Product was very good. Received quickly and complete
 ;
The Sony AV-3600 service manual was what I needed for the repair of this unit
Thanks for the good service
Dave
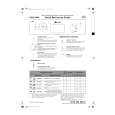
To begin calibration of the VCTCXO, select �Non-Signaling Test� from the �Modes� pull-down menu in PhoneTool and complete the following steps:
1. 2. 3. 4.
Click the "Non-Signaling Mode" button. Click the �Check Connection� button. Select TSC = 5. (Make sure the call box has the same setting for TSC) Check the �1900 Band� box to the right of the TX ARFCN box. (Very important! Not checking this box will cause the phone to transmit in the DCS band instead of the required PCS band). 5. Type �810� in the TX ARFCN box and press ENTER (on the keyboard). 6. Type �15� in the �TimeSlot 1� box and press ENTER (on the keyboard). 7. Click the �Burst Tx� of the RF Mode. This enables the transmitter. Check that a Tx signal is seen on the GSM Test Set. Measure the frequency error. A calibrated VCTCXO should provide a frequency error within ±500Hz at room temperature. 8. The frequency (and therefore the VCTCXO) is adjusted by changing the AFC DAC value in PhoneTool. Adjust the AFC DAC value until the frequency error measured on the GSM Test Set is within ±500Hz. Note the DAC value required. 9. Click �General Off� to turn off the transmitter. 10. From the �Modes� pull-down menu, select �EEPROM.� 11. Click �Read Values From Phone�
PROVISIONAL ISSUE
� 9-16 �
|
|
|
> |
|