|
|
|
Categories
|
|
Information
|
|
Featured Product
|
|
|
 |
|
|
There are currently no product reviews.
 ;
Excellent service manual. Complete service info. with schematics, step-by-step instructions and illustrations. Well worth the price!
;
Great product, helped me to restore vintage walkman cassette.
Just some pictures could be little bit more sharp and contrast
Thank you
;
I love older radio's and the service manuals that are sometimes hard to find. Was able to find a manual quite easily on this site.
;
Thank you for your shop manual! Your help was very useful - the device is repaired! Once again - Thank you! I wish you a successful business! Edward (Russia).
;
It was a great experience,instead of purchasing a new Stereo Amplifier ,in just minutes i repaired my old one and that was thaks to the manual I have purchased from you.
Thanks again.
Samuel Alter
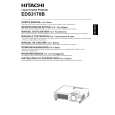
ED-S3170B (C3S3EA)
3. Adjustment
3-1 Before adjusting
3-1-1 Selection of adjustment When any parts in the table 3-1 are changed, choose the propper adjusting items with the chart. Table 3-1: Relation between the replaced part and adjustment
���������� ��������� ����� ������ ����� ������� ���� ������� ���������� ���� ���������� ���������� ���������� ���������� ���������� �������� ����������� �������� ������ �������� ���� �������� ����� ���� ���� ��������
: means need for adjustment. : means not need for adjustment. : means recommended. 3-1-2 Setting of condition before adjustment 1. Before starting adjustment, warm up the projector for about 10 minutes.(Blank white) 2. Set Zoom Wide to Max. And project an image with more than 40 inches in diagonal size. 3. Normalizing the video adjustment. (Press the [MENU] button of the Remote control transmitter to display the MAIN menu, and then press the [RESET] button. And select the [DEFAULT]. Next, open MAIN menu and press the [ ] key to display the PICTURE1 menu, then press the [RESET] key to set to [DEFAULT].) *note :The MAIN and PICTURE1 menu is not reset with no signal. 4. Set the normal at WHISPER in the OPTION menu. 5. Reset KEYSTONE correction. 6. Perform all adjustments from the Adjustment menu. Perform the following operations to display the Adjustment menu. a. Press the [MENU] button of the Remote control transmitter (the MAIN menu will appear). b. Next, press the [RESET] button one time. And press the [RESET] button again for 5 seconds or more (the Adjustment menu will appear).
3-2 Ghost adjustment
Signals for internal adjustment
���
Adjustment procedure 1. Use DAC-P - GHOST - R: in the Adjustment menu to adjust so that R color ghost is at a minimum. (Set the adjustment value to default, and then raise the value. When a ghost appears to the left of a vertical line, reduce the value by 2 or 3 steps.) 2. In the same way, use DAC-P - GHOST-G: in the Adjustment menu to adjust so that G color ghost is at a minimum. 3. In the same way, use DAC-P - GHOST-B: in the Adjustment menu to adjust so that B color ghost is at a minimum. 3
���
�����
�������
|
|
|
> |
|