|
|
|
Categories
|
|
Information
|
|
Featured Product
|
|
|
 |
|
|
There are currently no product reviews.
 ;
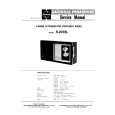
This manual is very good. 303 pages scanned in a very high resolution. My camera has bad, leaking capacitors which all of the V5000 models are suffering from these days.
There is a huge part list with all capacitors, transistors etc. in this manual which helped me a lot. Otherwise I would not have been able to buy replacement parts.
The dissassembly guide is very enormous and detailed. Unlike on the Panasonic MS1 manual I downloaded here it actually looks like the real parts look. And the screws are labeled correctly, so you shouldn't have any left after the repair. ;)
;
has all the schematics you could need,and very well laid out format also has all part numbers along with an exploded view which is helpful
 ;
Very nice to have! Now it is no problem to understand how it is put together.
Helps me a lot.
;
good scans, all is clear. all pages in order. recommended
;
Très-très bon site, facile, très bon prix.
Au futur besoin, je n’hésiterais à faire appel à vous.
Merci
Replacing the Lamp
All projector lamps will wear out eventually. If used for long periods of time, the image could become darkened, and the color contrast could be impacted as well. We recommend that you replace your lamps early. If the LAMP indicator turns red, or a message prompts you to replace the lamp when you power up the projector, the lamp needs to be replaced. (See "Related Messages" and "Regarding the Indicator Lamps" for details.)
1
Turn off the projector, and unplug the power cord. Allow the lamp bulb to cool for at least 45 minutes, and prepare a new lamp (sold separately: DT00511 for CPS317/EPS3170/EPS3170A or / DT00521 for CPX327/EDX3270/EDX3270A)
5
Insert the new lamp, and tighten the 1 screw firmly to lock it in place
� Also steadily push the opposite side of the screwed side of the lamp into the unit.
2
After making sure that the projector has cooled adequately, slowly flip over the projector, so that the bottom is facing up
3
Unscrew the 2 screws, and remove the lamp cover
6
Replace the lamp cover, and tighten the 2 screws firmly to lock it in place
4
Unscrew the 1 screw, and slowly pull out the lamp by the handle
� Be careful not to touch the inside of the lamp case.
7 8
Slowly turn the projector so that the top is facing up Turn on the projector power, and using the menu, reset the lamp timer
� To reset the lamp timer, from the OPTION menu, select LAMP TIME.
ATTENTION � Make sure that the screws are screwed in firmly. Loose screws could result in damage or injury.
� Do not use with lamp cover removed. � Do not reset the lamp timer without replacing the lamp. Reset the lamp timer always when replacing the lamp. The message functions will not operate properly if the lamp timer is not reset correctly. � When the lamp has been replaced after the message of "CHANGE THE LAMP ...THE POWER WILL TURN OFF AFTER 0 hr." is displayed, or the LAMP indicator is red, complete the following operation within 10 minutes of switching power ON.
NOTE
� The LAMP indicator is also red when the lamp unit reaches high temperature.
Before replacing the lamp, switch power OFF, wait approximately 20 minutes, and switch power ON again. If the LAMP indicator is still red, replace the lamp.
22
|
|
|
> |
|