Speedy confirmation to my order , with elaborate instructions .
Item Email , received immediately as desired by me.
A Pleasant & Satisfying Transaction.
Delivery came quite promptly and in a very readable format. Thank you.
Text excerpt from page 18 (click to view)
Installation
Installation
Ingrepp i spisen ska utföras av BEH�RIG FACKMAN. Spisen är tung. Kanter och hörn, som du vanligtvis inte kommer i kontakt med, kan vara vassa. ANV�ND HANDSKAR vid förflyttning av spisen.
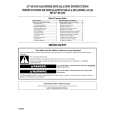
Spisen är 90 cm hög med ett sockeldjup på 53 cm, som du kan ändra (se nedan). Sockeldjupet mäter du från väggen till sockelns framkant (SE BILD). Spisen kan även installeras med en vägg eller ett högskåp på den ena sidan och en avställningsyta på den andra. Se till att spisens kabel inte kommer i kläm vid förflyttning av spisen.
5553
90
�ndring av sockeldjup
53 cm är minsta sockeldjup för spisen. Ett mindre sockeldjup kan medföra att spisen tippar vid tung belastning på luckan.
1 Lägg ned spisen försiktigt (SE BILD). Använd t.ex.
B B B B
frigolit från emballaget som skydd mellan golv och spis. 2 Skruva ur skruvarna B (4 ST, SE BILD) och ta bort sockeln. 3 Välj läge 55 cm (SE BILD B) och sätt tillbaka sockeln. Skruva i skruvarna B. Res upp spisen och anslut den elektriskt. Skjut 4 in spisen på plats och nivåjustera (se nedan) innan du monterar säkerhetsutrustningen.
B
55 53
Nivåjustering
Spisen måste stå plant för att t.ex. fettet ska fördela sig jämnt i stekpannan. Placera ett vattenpass eller en stekpanna med vatten på hällen när du vill kontrollera att spisen står plant. Vid behov kan du från sockelns framsida sänka resp. höja (-6, +12mm) spisens hjul och fötter. Använd en kryssmejsel för att justera de bakre hjulen och en polygrip till de främre fötterna (1). När spisen står plant �låser� du fötterna med muttern. Använd den medföljande nyckeln, skruva moturs (2).
2