|
|
|
Categories
|
|
Information
|
|
Featured Product
|
|
|
 |
|
|
There are currently no product reviews.
 ;
Manual was delivered in a timely manner and was all in English as advertised. The manuals I received when we moved into our flat were in German, Italian, and French. Having never used a steamer before, and not speaking/reading German very well, I needed an English Manual. this was a huge help.
 ;
Great Manual. This manual is available no where else. It was exactly what I was looking for. Only in German.
;
This GRUNDIG UV5A Owner Manual is not only an instruction manual but a total functional circuit description of the Multimeter and includes circuit diagram at the end pages. It is very helpful for repairing and calibrating the instrument. It is written in two languages English and German for international support. It was very easy to repair my unit with this document. Regards, Regis Pauly, Electrical Engineer.
;
The owner's manual was evetything I thought it would be. I was able to print it out using both sides of the paper in quick order, saving me a search online for a used one.
;
Хорошее качество сканирования.
Мануал пришел часов эдак через 12. В целом доволен.
ELECTRICAL CONNECTION
� Make sure the appliance is installed and connected to the electricity supply by a qualified technician in accordance with the manufacturer's instructions and in compliance with local regulations. The installer is responsible for the correct electrical connection of the appliances and the observance of the relative safety recommendations. � The appliance must be connected to the electricity supply by means of an all-pole disconnect switch with minimum contact gap of 3 mm. The appliances must be earthed by law. Do not use multiple plug adapters or extension leads. After the oven has been installed, the electrical components must be concealed.
� � �
�
Connecting the oven to the power supply
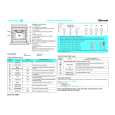
� Make sure that the voltage shown on the rating plate is the same as the power supply voltage in your home. The service number is located on the front edge of the oven cavity (visible when the oven door is open). Use a type H05RR-F power cord (minum length: 800 mm). Warning: All the oven's components operate at 230-240V. When using a 400 V connection, make sure that the voltage reaching the oven is 230-240V, as illustrated in the side table. Conductors X number 1N+ 2N+ 3+ 3N+ Electrical connection H05 RR-F 3X4 mmq H05 RR-F 4X2.5 mmq H05 RR-F 4X2.5 mmq H05 RR-F 5X1.5 mmq
� �
~ ~ ~ ~
Interconnecting cooktop and oven
� Before connecting the oven to the power supply, check that the cooktop is among the ones listed in the cooktop/oven pairing product sheet. Connect the 3 pole and 4 pole connectors to the respective connectors on the oven. The 3 pole connectors (H) is located at the rear right hand side of the control panel, the 4 pole connector (J) is located at the top of the oven in the left hand corner (see figure). Connect the yellow/green striped earth wire ( ) (K) from the cooktop to the screw located near the 3 pole connector. WARNING: DO NOT CONNECT TO THE POWER SUPPLY BEFORE YOU HAVE FINISHED CONNECTING THE OVEN AND THE COOKTOP. � 18 Mount the oven in the kitchen unit. Make sure the power cord is not entrapped.
�
�
|
|
|
> |
|