The Owner's manual was very helpful. The WEGA is about 35 years old and needed repair.
Your Website is pretty good und easily to handle.
Thank You
Carl-W. Lohmann
My first manual from Owner-Manuals.com but not the last! I am very satisfied with the easy ordering and promt delivery of a manual I did not find anywhere else.
This manual is very helpfull to use the Power Supply. All technical information has been available.
For service use the circuit diagrams are very good.
Thanks .
Very comprehensive document which is a must-have for any Satellit 2100 owner whose set up is somewhat intricate. Due to the bad quality of the pictures that are rather dark and a bit blurred I gave 4-star feedback.
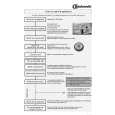
Text excerpt from page 18 (click to view)
Rear spacers
In the bag with the documentation, there are two spacers which must be fitted as shown in the figure. Slacken the screws and insert the spacer under the screw head, then re-tighten the screws.
Door reversal directions
Before reversing the door make sure that the following tools are available: 1 cross-slotted screwdriver 1 slotted screwdriver 1 10 mm wrench The accessory bag containing: door fastener In order to reverse the door proceed as follows: 1. Disconnect from the electricity supply. 2. Gently lay the fridge/freezer on its back with the top held away from the floor by 5-8 cm (2-3 inches) of packing; 3. Remove the ventilation grill (D). 4. remove the bottom hinge (E) by unscrewing its three fixing screws; 5. Remove the lower door by sliding it out of the middle hinge (I). Remove the hole cap for the hinge pin and mount it on the other side; 6. Remove the lower middle hinge (I), remove the pin and mount it on the other side; 7. Remove the screw hole cover caps (L) on the plate on the other side and mount them where the hinge has just been removed; 8. Mount the hinge on the other side; 9. Mount the lower door; 10.Remove the pin of the lower hinge and mount it on the other side; 11.Mount the lower hinge (E) on the other side, remove hole cap (F) from the aeration grid (D) by pressing it in the direction indicated by the arrow and mount it on the other side; 12.Mount the aeration grid (D) again by snapping it into place; 13.Remove the three screws of the upper middle hinge (M); 14.Remove the fridge door by releasing it from the top hinge pin (G). 15.Remove the upper door by sliding it off the upper pin (A); remove the door hole cap for the hinge pin and mount it on the other side: 16.Unscrew the upper pin (A) and mount it on the other side; 18
G
3P004
PR18