The manual was everything that I wanted. Clearly printed and delivered in very quick time. Would certainly use again if I needed a manual in the future
Great price for the manual and easy to locate on the site and download. I would buy again.
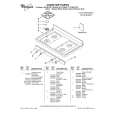
Text excerpt from page 18 (click to view)
Building-in
This dishwasher is designed to be fitted under a kitchen counter or a worksurface. It is essential that the recess dimensions indicated in the illustration are followed. No further openings for venting of the dishwasher are required, but only to let the water fill and drain hose and power supply cable pass through. The height of the recess where the dishwasher is to be installed can vary between 820 and 880 mm from the floor since the dishwasher is fitted with adjustable feet (max. 60 mm).
II25
Fitting the vapour protection
Screw the vapour protecting strip onto the front part of the worktop. Use 4 screws (3.5 x 16 mm) as shown in the illustration.
600 mm
600 mm
Leave a space of 2 mm between the top of the dishwasher and the underside of the kitchen counter.
Fitting the sealing strips to the sides of the appliance
To ensure closer contact with adjacent kitchen units, fit the plastic sealings strips down both sides of the front of the machine before inserting it into the recess.
A A
A
II23
A
Adjusting the height of the dishwasher
The dishwasher incorporates adjustable feet to allow the adjustment of the height. To adjust the height proceed as follows: 1. Loosen or tighten the two front feet. 2. Loosen and remove the adjustable plinth. 3. Adjust the rear foot by turning the screw in the middle of the front kick plate to the left or to the right. Good levelling is essential for correct closure and sealing of the door. When the appliance is correctly levelled, the door will not catch on the levelling spacers on either side of the cabinet. If the door does not close properly, loosen or tighten the adjustable feet until the machine is perfectly level. If there is a space at the bottom of the machine,this can be covered by lowering the plinth.
Fixing to the adjacent units
Tighten the screws so that the dishwasher cannot tip forward and cause damage when the door is open and loaded. Secure the dishwasher by screwing it firmly in position under the bench or to the cupboard beside it. Use the angular brackets supplied which are fitted into the slots on the top of the dishwasher (see fig.). Tighten the machine in position (upwards or sideways) by using the screws supplied (3.5 x 16 mm).
II54
The dishwasher must be secured to the underside of the worktop or to adjacent units by using the brackets supplied. Neglect to do this can cause injury or damage. Under no circumstances may holes be drilled through the sides of the dishwasher since this could damage the hydraulic components.