|
|
|
Categories
|
|
Information
|
|
Featured Product
|
|
|
 |
|
|
There are currently no product reviews.
 ;
What can i say but i would have been lost without your support.
Thank You!
;
Très satisfait ! envoi rapide, Grand catalogue disponible. Many thanks !
;
Delivery came quite promptly and in a very readable format. Thank you.
;
I found my Clarion VRX8370R in the Camper I bought and I wasn't able for month to understand it.
The Owner Manual was perfect and just what I was searching for.
Thank you.
Leonardo
;
Very good copy of Manual, clear and easy to print off, arrived very promptly and reasonably priced.
Thanks, I will use you again.
INS TAL LI NG Y O UR F R EE Z ER
Choosing the proper location
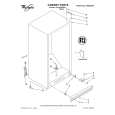
Read the following items before choosing the location for the freezer. See �Completing the installation� below before sliding freezer into place. 1. Pick a safe place, indoors, away from flammables such as gasoline. 2. Check the strength of the floor. It should hold the weight of a fully loaded freezer. 3. Allow at least 3 inches (7.5 cm) of air space at top and both sides of freezer. 4. Allow at least 1 inch (2.5 cm) of air space between the back of the freezer and the wall. 5. If the freezer is to be against a wall, you might want to leave extra space on the hinge side so the door can be opened wider. 3 inches min.
±
3 inches min.
±
Completing the installation
Level freezer so the door will stay open at any position. 1. Locate, remove and discard the 4 bolts that held the freezer in the shipping crate. 2. Locate the 2 front leveling legs taped among the packing materials. 3. Screw these legs into the front holes on the bottom of the freezer. The back of the freezer rests on 2 fixed supports. 4. Adjust the 2 front legs so freezer does not rock. 5. Connect freezer to proper electrical supply and attach retaining clip. (Refer to �Locating the proper electrical supply� on page 5.) 6. Slide freezer into place. 7. Place a level on top of the freezer�first side to side then front to back. Turn leg counterclockwise to raise a corner. Turn leg clockwise to lower a corner. 8. Repeat Step 7 until the freezer is level. 9. After freezer is fully loaded, recheck with level.
Lower
±
Raise
6
± ±
± ±
± ±
|
|
|
> |
|