|
|
|
Categories
|
|
Information
|
|
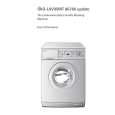
Featured Product
|
|
|
 |
|
|
There are currently no product reviews.
 ;
This Manual (as downloaded) is both informative and comprehensive and has proved to be extremely useful. thoroughly recommended.
;
everything is ok, thank you very much! Product is good, no problems with download!
;
Great site, I always find all the manuals I need and i can't find anywhere else. PDF for the Sony PCM 3348 is complete and scan is good quality. Thank you!
;
It was a complete manual as stated. Very good source for older product manuals. Thanks
;
Scan quality is very good. Price is very reasonable. If you're looking to purchase a copy of this manual, this is the one to get.
INSTALLATION
Débridage
Avant de mettre la machine en marche il est indispensable d'enlever les dispositifs de sécurité utilisés pour le transport.
Il est conseillé de conserver tous ces dispositifs,
car ils devront être remontés en cas de transferts futurs de l�appareil. 1. Dévissez à l'aide de la clé la vis arrière droite. 2. Couchez l'appareil sur le dos, en faisant attention à ne pas endommager les tuyaux. A cet effet placez une cornière de l'emballage entre la machine et le sol.
P0255
3. Enlevez les blocs de polystyrène du fond de la machine. 4. Dégagez les deux sachets en polyéthylène en enlevant l'adhésif. Extrayez avec soin le sachet droit (1) et ensuite le sachet gauche (2) en les tirant vers le centre de l'appareil.
P0802
2
1
P0233
5. Remettez la machine debout et dévissez les 2 autres vis à l'arrière. 6. Extrayez les trois goujons en plastique des trous où se trouvaient les vis. 7. Bouchez les trous restés libres à l'aide des caches qui se trouvent à l�arrière de l�appareil.
Emplacement
Placez l�appareil sur un sol plat et dur. Veillez à ce que l�appareil ne touche pas au mur ou aux autres meubles de la cuisine. Le robinet, l�installation pour la vidange et la prise de courant doivent se trouver à proximité des tuyaux de la machine et du câble d�alimentation.
P0256
P0020
56
|
|
|
> |
|