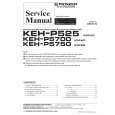
|
|
|
Categories
|
|
Information
|
|
Featured Product
|
|
|
 |
|
|
There are currently no product reviews.
 ;
Das ging ja sehr unkompliziert hat bestens geklappt und die Quallität ist auch noch gut.
Vielen Dank dafür.
;
Everything okay, thanks a lot. It was a pleasure for me to make a deal with you.
;
A deal without problems, very fast and the manual is a good quality. Sorry for the my english.
;
Superb service and excellent quality of the document received
;
no problems with the purchase of a circuit diagram
FS-SD5/FS-SD7/FS-SD9 <CD mechanism base assembly>
Prior to performing the following procedure, remove the CD mechanism base assembly. Refer to "Dismantling and assembling the CD mechanism assembly" on page 1-5 for the treatment of optical pickup.
CD mechanism cover CD mechanism board
U
CN706
Speaker terminal board
T U
Removing the speaker terminal board (See Fig.28)
1. Remove the two screws T attaching the speaker terminal board on the underside of the CD mechanism base assembly.
CN703
U
CD mechanism assembly
Fig.28
U
Removing the CD mechanism board / CD mechanism assembly (See Fig.28 to 32)
1. Turn over the CD mechanism base assembly and disconnect the harness from connector CN703 and CN706 on the CD mechanism board. 2. Turn over the CD mechanism base assembly and disconnect the harness from connector CN703 and CN706 on the CD mechanism board. 3. Turn back the CD mechanism assembly and detach the CD mechanism cover while pulling the CD mechanism assembly outward to release the two joint tabs marked c. 4. Disconnect the card wire from the connector of the CD mechanism assembly inside the CD mechanism cover. Disconnect the harness from CN605 on the CD mechanism board. Pull the CD mechanism assembly out of the three shaft of the CD mechanism cover. ATTENTION: When reassembling, confirm that the cushion of the CD mechanism assembly is reattached to the three shafts. 5. Remove the CD mechanism board from the CD mechanism cover.
Cushion CD mechanism assembly Cushion CD mechanism cover
Joint c
Tab
CD mechanism cover
Fig.29
CD mechanism assembly
CD mechanism cover Tab
Joint c
Fig.30
Shafts
CD mechanism cover
CN605 CD mechanism board
Short circuit land
CD mechanism board
Fig.31
Fig.32
1-13
|
|
|
> |
|