|
|
|
Categories
|
|
Information
|
|
Featured Product
|
|
|
 |
|
|
There are currently no product reviews.
 ;
Was happy to find the complete owners manual... It's all in there, just like the original...
;
Thanks for offering this item at such a good price. Proved handy in identifying the part I was looking for my set.
;
Thr Video Recorder i have is quiet Old and the Producer could Not help me. So i w as very glad to find an offer for the owners Manual for a very fair Price.a I obtained the original Manual very quick and I am happy to have it now.
 ;
The PDF copy was immediately available on download after the payment. However, I noticed that the document was in German, and Ihad to contact a German translator to get it translated it to English. The quality of document is legible can be used for my purpose.
;
The manual was complete and of great quality. Originally a tri-lingual file, I first received only one language. After a note to owners-manuals.com, I quickly received the remaining languages... Great service, definitely worth it.
Tape Operation/Recording
IMPORTANT! � Before playing a tape, check and tighten slack tape with a pencil. Slack tape may get jammed or may burst in the mechanism. � Store tapes at room temperature and do not put them too close to a magnetic field (for example, a transformer, TV set or speaker). Rewinding or forwarding fast when playback is stopped
1 2
Press 1 or ¡ on the front panel (or press 2 or 3 on the remote control). Press 7 when you reach the desired passage. Resetting tape counter number
� In stop mode, press 7.
Tape playback 1 2
Press 0 to open the tape deck door. Insert a recorded tape and close the tape door. � Load the tape with the open side down and the full spool to the left.
General information on recording
� If you don�t intend to record via the microphone, unplug it to avoid unwanted recording source. � For recording, only use tape of IEC type I(normal tape). � The recording level is set automatically, regardless of the position of the Volume, Vocal, Key control and so forth. � The type is secured at both ends with leader tape. At the beginning and end of the tape, nothing will be recorded for seven seconds.
3
Press TAPE (TAPE 1�2) or TAPE1/2 on the remote control repeatedly to select tape deck 1 or tape deck 2. � The selected tape deck number is displayed.
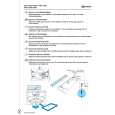
� To prevent accidental recording, break out the tab on the left shoulder of the tape side you want to protect.
4
Press 38 to start playback.
Stopping playback � Press 7. Changing the playback mode � Press AUTO REPLAY repeatedly to select: ONCE, AUTO REPLAY. The default setting is ONCE. AUTO REPLAY ... the tape will rewind automatically at the end of playback and replay. It will replay up to max. 10 times or until you press 9. ONCE ........................... the selected side will be played once.
� Press REC in Tuner, Disc or AUX mode, press REC, and �CHECK TAPE� will scroll on the display if there is no recordable tape in tape deck 2.
37
English
|
|
|
> |
|