I was so happy that the owner's manual was available. It is well written and helped me to use the radio/CD player/recorder without problems. Thanks for making it available.
Irene Lambert
Thanks so much for the Owner's manual for my Sony PS - FL1. I had purchased the turntable off of eBay. It came in and looked great. Packed well and appeared to be great. I balanced and aligned the tone are and hooked it up. When trying to play a record the tone are would move to the right place and just before it would drop to play it moved back off the edge of the record before touching down. I searched the net for an answer to this issue. No luck. Then I purchased the owners manual and sure enough there was a place to adjust where the stylus touched down. That adjustment solved the problem and saved me a $35 feet to have the player checked out. The manual is well written and easy to understand. It is a must have for anyone with this front loading Sony turntable.
Some years back I pruchased a Sansui G-9000. I had it cleaned up and a problem with the left channel repaired. When I got it back I hooked it up to my tape decks, turn tables, TV and it played great. The only thing I was not really satisfied with was the performance of my Graphic Equalizer. I purchased this owner's manual had poured myself a cup of coffee. The manual is well organized and written in plain language. It also contained the solution to my dissatisfaction. By using the preamp connections coupled I was able to run everything through my graphic equalizer and now enjoy the full potential of my complete system.
An excellent service for the price, however, it would also have been handy if the troubleshooter pages were included. The manual is only sent in the language of your country, thus it looks as though there are some pages missing. Otherwise highly recommended.
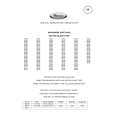
Text excerpt from page 15 (click to view)
Installation
Justering af sokkeldybde og -højde
Hvis begge mål skal justeres, gøres det samtidig. Sørg imidlertid for at læse hele vejledningen nøje igennem, inden De påbegynder arbejdet. 1. Læg forsigtigt komfuret ned på forsiden. Brug dele af emballagen til at beskytte komfuret mod gulvets overflade. 2. Til justering af sokkeldybden fjernes skruerne A (2 skruer), hvorefter skruerne B på beslaget (2 skruer) løsnes (se illustration). 3. Indstil soklen til den ønskede dybde (SE
ILLUSTRATION).
4. Stram skruerne A og B.
49 50 51 52
5. Til justering af sokkelhøjde fjernes skrue C (1 skrue) midt for på den bagerste del af soklen, hvorefter skruerne D (4 skruer) løsnes (SE ILLUSTRATION). Pas på: der er skarpe kanter på undersiden af komfuret. 6. Indstil soklen til den ønskede højde, 90, 88 eller 85 cm (SE ILLUSTRATION). 7. Stram skruerne C og D.
Nivellering af komfuret
Komfuret skal stå helt lige, bl.a. for at sikre, at fedtstoffet fordeles ligeligt over hele stegepanden. Kontroller med et vaterpas, at komfurpladen er vandret (læg ikke vaterpasset på selve brænderne). Kontroller først niveauet fra front til bag og derefter fra side til side. Om nødvendigt nivelleres komfuret ved at dreje på hjulene og fødderne, hvilket gøres fra komfurets forside. Brug en skruetrækker til baghjulene og en skruenøgle til forfødderne.