Thank you for having the manual I needed for an older model Aiwa stero I had found on Ebay --- I wanted the Aiwa because I had tapes and cd's but I did not have a manual as to how to operate the system... I found what I needed and it has enabled me to set the system up for my enjoyment.
I wished detailed information of the JBL S310 and here I found it! Very happy with the service from this site!
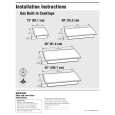
Text excerpt from page 7 (click to view)
Connessioni
USCITA ARIA VERSIONE ASPIRANTE (EVACUAZIONE ESTERNA) Per installazione in Versione Aspirante collegare la Cappa alla tubazione di uscita per mezzo di un tubo rigido o �essibile di ø150 o 120 mm, la cui scelta è lasciata all�installatore. � Per collegamento con tubo ø120 mm, inserire la Flangia di riduzione 9 sull�Uscita del Corpo Cappa. � Fissare il tubo con adeguate fascette stringitubo. Il materiale occorrente non è in dotazione. � Assicurarsi che non siano presenti i Filtri antiodore al Carbone Attivo
USCITA ARIA VERSIONE FILTRANTE (RICIRCOLO INTERNO) � Praticare un foro ø 120 mm sulla Mensola soprastante la Cappa. � Inserire la Flangia di riduzione 9 sull�uscita del Corpo Cappa. � Collegare l�uscita del Corpo Cappa con la parte superiore del pensile per mezzo di un tubo rigido di ø 120 mm, la cui scelta è lasciata all�installatore. � Fissare il tubo con adeguate fascette stringitubo. Il materiale occorrente non è in dotazione. � Assicurarsi della presenza dei Filtri antiodore al Carbone Attivo.
CONNESSIONE ELETTRICA � Collegare la Cappa all�Alimentazione di Rete interponendo un Interruttore bipolare con apertura dei contatti di almeno 3 mm.