|
|
|
Categories
|
|
Information
|
|
Featured Product
|
|
|
 |
|
|
There are currently no product reviews.
 ;
Hi, thankyou for providing the Nordmende Globetrotter original manufacturer's repair manual. Quality is very good and sharp - the PDF file was comfortably small to download. The only question is: why did it take so long to become ready for download?? Many thanks anyway, I fixed the fault in the radio thanks to the circuit.
regards: Nick
 ;
This was super service.Ordered this manual and was reading the download an hour later
;
as always, rapid and efficient, very good and clear prints
details clearly visible keep going this way!!!!!!
;
I expect a wonderful result as alaways!!!!!!
Usually is much faster....
;
Wow very wonderful and clear!!!! I will always trust them
3. 4 REEL DISK ASSY(SUP) 5 REEL DISK ASSY(TU) 6 REEL COVER ASSY NOTE4:
(W 4 ) NOTE 4 4 8 (S 6 a) (W 6 )
WHITE BLACK
(W 5 ) NOTE 5 5 10 (S 6 b) 9 (S 6 a)
Be careful not to attach the REEL DISK wrongly. The Supply side can be identified by the white color at the center.
NOTE 4 , 5
NOTE5: Be careful not to attach the REEL DISK wrongly. The Take-up side can be iden-
REEL DISK ASSY
(W 6 )
tified by the black color at the center.
NOTE6: Perform the following steps for mounting. 1. Align the 2 holes with the pins. 2. Attach the PINCH ROLLER ARM ASSY by aligning the positions. 3. Attach the SUB DECK NOTE 6 ASSY by aligning the 3 5 2,6 positions. 4. Check that the parts below them are located in the correct positions. 4
SUP TU
6 NOTE 6
5. Tighten the 2 screws. 6. Tighten the screw. 7. Attach the 2 SLIT WASHER parts.
4. 7 TENSION ARM ASSY 8 SLANT POLE ARM ASSY 9 TU ARM ASSY 0 SWING ARM ASSY NOTE7: When detaching, remove the spring of the @ PAD ARM ASSY in advance. Pay attention to the attachment po-
1, 7
Fig. 2-4-5
NOTE 7
8 NOTE 7
SPRING
NOTE 8
(P 8 ) NOTE 8 NOTE 10 10
7
11 (S 10 )
NOTE 9 9
sition.
NOTE8:
A
When mounting the SLANT POLE ARM ASSY, hook the spring onto the lug as in diagram A, and fit the combination onto the SLIDE DECK ASSY. After fitting, hook the spring onto the lug of the SLIDE DECK ASSY as in diagram B. Be careful not to lose the spring.
SPRING
B
NOTE 7
NOTE 9
NOTE9: Pay attention to the mounting position.
NOTE0: When detaching, remove the screw
NOTE 10
Fig. 2-4-6
then remove the SWING ARM ASSY by pulling it up and turning it.
2-8
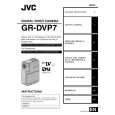 $4.99 GR-DVP7U JVC
Owner's Manual Complete owner's manual in digital format. The manual will be available for download as PDF file aft…
|
|
|
> |
|