|
|
|
Categories
|
|
Information
|
|
Featured Product
|
|
|
 |
|
|
There are currently no product reviews.
 ;
I purchased the unit from a private party and the original owners manual was not available. Having the ability to download it was extremely helpful and clarified operating the equipment immensely. This is a complicated unit and without the manual I would not have been able to maximize it's potential. Thank you.
;
Being a user of older radios of many kinds, preferring them over more modern rigs, this manual was invaluable in the programming of my two. I now know for certain what the assorted buttons functions are, and am very grateful to have found this excellent site. Many thanks for your assistance, Tony.
 ;
Clear and easy to read. All details as expected. Price acceptable , and quick delivery.
;
Quick response and exactly what I was looking for and at a great fair price!
;
5 star quality on these downloadable manuals. Easy to read and all the information is there. A must when doing a custom install or needing to service your precious old school electronics.
46
EN
USING THE REMOTE CONTROL UNIT (cont.)
Power Switch
Insert Editing
You can record a new scene onto a previously recorded tape, replacing a section of the original recording with minimal picture distortion at the in- and out-points. The original audio remains unchanged.
NOTE:
Use the RM-V700U remote control unit to perform this procedure.
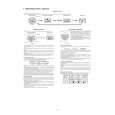
1 SELECT OPERATION MODE 2 FIND EDIT-OUT POINT
REW (2) Button FF (3) Button PLAY/PAUSE (4/6) Button STOP (5) Button COUNTER R/M Button
Set the Power Switch to �PLAY�.
Play back the tape, locate the point and press PAUSE on the camcorder or the remote control. Press and hold COUNTER R/M for more than 1 second to reset the tape counter, then press again for less than 1 second so that �M� appears.
3 RESET COUNTER
4 FIND EDIT-IN POINT
Display
w
M 0 : 12 : 34
Press REW to go a little beyond the beginning of the scene you want to replace, press PLAY to view the recorded tape, and press PAUSE exactly at the point where the new scene should start.
Insert editing indicator
Tape Counter
5 ENGAGE INSERT EDITING MODE 6 BEGIN INSERT EDITING 7 END INSERT EDITING
NOTES:
Press STOP.
Press and hold INSERT, and without releasing INSERT, press and release PAUSE. The Insert Editing mode is engaged. When the scene the camcorder is aimed at appears on the screen, go to the next step. Press START/STOP. When the counter reaches �0:00:00�, editing stops automatically and the camcorder enters the Insert-Pause mode.
Remote sensor
START/STOP PAUSE STOP INSERT
� During Insert Editing, the original audio will be heard from the speaker. � After step 5, Retake ( pg. 17) can be performed. � The tape may stop slightly before or after the designated end point, and noise bars may appear. Neither indicates a defect in the unit. � Only the video signal is recorded in the Insert Editing mode.
REW PLAY
RM-V700U (optional)
|
|
|
> |
|