|
|
|
Categories
|
|
Information
|
|
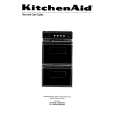
Featured Product
|
|
|
 |
|
|
There are currently no product reviews.
 ;
This is an excellent handbook. We had no information on the appliance until we obtained this and are now able to use the appliance to its full potential. Strongly recommended.
;
Very happy to find this from owners-manual.com and the enclosed spec sheet as well.
Not longer available from Sony.
;
The Owner's manual was very helpful. The WEGA is about 35 years old and needed repair.
Your Website is pretty good und easily to handle.
Thank You
Carl-W. Lohmann
;
Perfect. Very good service and very good scanning quality. All sheets are very legible. Thank's
;
My first manual from Owner-Manuals.com but not the last! I am very satisfied with the easy ordering and promt delivery of a manual I did not find anywhere else.
Sensor Cooking
A sensor in the microwave oven detects humidity released from the food and automatically sets a cooking time based on the selected pad. Use the following chart as a guide. FOOD Baked Potatoes SERVING SIZE INSTRUCTIONS
Sensor Reheat
A sensor in the microwave oven detects humidity released from the food and automatically sets a reheat time based on the selection. Use the following chart as a guide. FOOD Dinner Plate (refrigerated) Soup Sauce Casserole (refrigerated) SERVING SIZE/INSTRUCTIONS 8-16 oz (227-454 g) Cover with plastic wrap and vent. 1-4 cups (250 mL-1 L) Cover with plastic wrap and vent. 1-4 cups (250 mL-1 L) Cover with plastic wrap and vent. 1-4 cups (250 mL-1 L) Cover with plastic wrap and vent.
1-4 medium, Pierce each one several 10-13 oz times with a fork. Place on (283-369 g) each turntable around edges, at least 1" (2.5 cm) apart. At the end of cooking, let stand 5 minutes. 1-4 cups (250 mL-1 L) Remove from package. Place in microwavable container. Cover with plastic wrap and vent. Stir and let stand 2-3 minutes. Place in microwavable container and add 2-4 tbsp (30-60 mL) water. Cover with plastic wrap and vent. Stir and let stand 2-3 minutes. Remove from package. Loosen cover on three sides. If not in microwavable container, place on plate, cover with plastic wrap and vent. Follow measurements on package for ingredient amounts. Place rice and liquid in microwavable dish. Cover with loose-fitting lid. At the end of cooking, allow rice to stand for 5 minutes, or until liquid is absorbed. Stir. Place in microwavable dish. Cover with plastic wrap and vent. At the end of cooking, let stand for 2-3 minutes.
Frozen Vegetables
To Use Reheat:
Before using, make sure the microwave oven has been plugged in for at least 3 minutes, the room temperature is not above 95°F (35°C) and the outside of the container and microwave oven cavity are dry. 1. Place food on the turntable and close the door. 2. Touch REHEAT until the desired food type is displayed. The microwave oven will automatically turn on after a brief delay. When the cycle ends, �END� will appear in the display, and the end-of-cycle tones will sound, followed by reminder tones. 3. Touch OFF-CANCEL or open the door to clear the display and/or stop reminder tones.
Fresh Vegetables
1-4 cups (250 mL-1 L)
Frozen Entrée
10-20 oz (283-567 g)
Rice
0.5-2 cups (125-500 mL) dry rice (Use medium or long grain rice.)
Fish Seafood 0.25-2 lbs (113-907 g)
To Use Cook:
Before using, make sure the microwave oven has been plugged in for at least 3 minutes, the room temperature is not above 95°F (35°C) and the outside of the container and microwave oven cavity are dry. 1. Place food on the turntable and close the door. 2. Touch COOK until the desired food type is displayed. The microwave oven will automatically turn on after a brief delay. When the cycle ends, �END� will appear in the display, and the end-of-cycle tones will sound, followed by reminder tones. 3. Touch OFF-CANCEL or open the door to clear the display and/or stop reminder tones.
11
|
|
|
> |
|