|
|
|
Categories
|
|
Information
|
|
Featured Product
|
|
|
 |
|
|
There are currently no product reviews.
 ;
The service manual was very usable and clear enough to see the individual values of all of the components (unlike some of the service manuals I have gotten in the past from web sites similar to this one). The price was right and the information was greatly appreciated. It helped me with an otherwise very difficult repair. It was much needed and appreciated. A faster turn around on my order would be nice, but I understand the constraints on your staff's time. Thank you for your service.
 ;
Excellent manual. Helped me out with disassembling and troubleshooting my projector.
;
thanks you are the best.Very good detail, Quick service response. A useful service manual with all details.
;
Great service!!! Polecam gorąco wszystkim zainteresowanym
;
I liked the price plus it had everything i needed to service the tv.
thankyou Tim Hertz
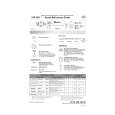
HCD-GPX6/GPX7 SECTION 5 ELECTRICAL ADJUSTMENTS
DECK SECTION
1. Demagnetize the record/playback head with a head demagnetizer. 2. Do not use a magnetized screwdriver for the adjustments. 3. After the adjustments, apply suitable locking compound to the parts adjust. 4. The adjustments should be performed with the rated power supply voltage unless otherwise noted. 5. The adjustments should be performed for both L-CH and RCH. 6. Switches and controls should be set as follows unless otherwise specified.
CD SECTION
Note: 1. CD Block is basically designed to operate without adjustment. Therefore, 2. 3. 4. check each item in order given. Use YEDS-18 (3-702-101-01) unless otherwise indicated. Use an oscilloscope with more than 10M� impedance. Clean the object lens by an applicator with neutral detergent when the signal level is low than specified value with the following checks.
RF signal waveform VOLT/DIV : 200mV TIME/DIV : 500ns
level : 0.7 ± 0.3 Vp-p
S-CURVE CHECK
� CD BOARD (Conductor Side) �
Oscilloscope CD board TP(FE) TP(VC)
REC BAIS ADJUSTMENT
Setting:
digital voltmeter (AC range) MAIN board TP101 (L), TP201 (R) TP (GND)
Procedure : 1. Connect an oscilloscope to TP (FE) and TP (VC) on the CD board. 2. Press the I/1 button to turn the power ON. 3. Load a disc (YEDS-18) and actuate the focus search. (In consequence of open and close the disc tray, actuate the focus search) 4. Confirm that the oscilloscope waveform (S-curve) is symmetrical between A and B. And confirm peak to peak level within 2.0 ± 0.5 Vp-p.
S-curve waveform symmetry
Procedure: 1. Connect a digital voltmeter (AC range) to TP101 (L), TP201 (R) and TP (GND) on the MAIN board. 2. Insert a tape. 3. 4. 5. 6. 7. Press the I/1 button to turn the power on, and press the [FUNCTION] button to select TAPE function. Press the [z REC] button twice to start recording. Adjust RV101 (L-ch), RV201 (R-ch) on the MAIN board so that the digital voltmeter reads AC 6.15 V. Connect an oscilloscope or frequency counter to TP101 (L), TP201 (R) and TP (GND) on the MAIN board. Confirm that the frequency is 82 kHz ±3 kHz.
TP (VC)
TP (FE) IC101
A within 2.0 ± 0.5 Vp-p B
TP (RFACO)
Adjustment Location:
� MAIN BOARD (Conductor Side) �
Note: � Try to measure several times to make sure than the ratio of A : B or B : A is more than 10 : 7. � Take sweep time as long as possible and light up the brightness to obtain best waveform.
REC BIAS ADJUSTMENT TP201 (R) (R-CH) (L-CH) RV101
Connecting Location: CD board
RFAC LEVEL CHECK
oscilloscope CD board
RV201 TP101 (L) TP (GND)
TP(RFACO) TP(VC)
Procedure : 1. Connect an oscilloscope to TP (RFACO) and TP (VC) on the CD board. 2. Press the I/1 button to turn the power ON. 3. Load a disc (YEDS-18) and playback. 4. Confirm that oscilloscope waveform is clear and check if RFAC signal level is correct or not.
Note: Clear RFAC signal waveform means that the shape � � � can be clearly distinguished at the center of the waveform.
Connecting Location: CD board
21
21
|
|
|
> |
|