|
|
|
Categories
|
|
Information
|
|
Featured Product
|
|
|
 |
|
|
There are currently no product reviews.
 ;
Thanks so much for the Owner's manual for my Sony PS - FL1. I had purchased the turntable off of eBay. It came in and looked great. Packed well and appeared to be great. I balanced and aligned the tone are and hooked it up. When trying to play a record the tone are would move to the right place and just before it would drop to play it moved back off the edge of the record before touching down. I searched the net for an answer to this issue. No luck. Then I purchased the owners manual and sure enough there was a place to adjust where the stylus touched down. That adjustment solved the problem and saved me a $35 feet to have the player checked out. The manual is well written and easy to understand. It is a must have for anyone with this front loading Sony turntable.
 ;
Some years back I pruchased a Sansui G-9000. I had it cleaned up and a problem with the left channel repaired. When I got it back I hooked it up to my tape decks, turn tables, TV and it played great. The only thing I was not really satisfied with was the performance of my Graphic Equalizer. I purchased this owner's manual had poured myself a cup of coffee. The manual is well organized and written in plain language. It also contained the solution to my dissatisfaction. By using the preamp connections coupled I was able to run everything through my graphic equalizer and now enjoy the full potential of my complete system.
 ;
An excellent service for the price, however, it would also have been handy if the troubleshooter pages were included. The manual is only sent in the language of your country, thus it looks as though there are some pages missing. Otherwise highly recommended.
 ;
I am happy to get a rare TECHNICS SH-9090 Owner's Manual by PDF in clear copy.
 ;
Hr, klasse , good manual, verry fast on my e-mail, very usefull manual. rgds; ahm zeegers
INSTALLATION BEFESTIGUNG DER KOCHMULDE
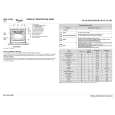
Die Kochmulden sind mit Pla ¨ttchen und Schrauben ausgestattet, um die Kochmulde an Mo ¨beln zu befestigen. - Das Mo ¨belstück (wie in der Abbildung der vorhergehenden Seite gezeigt) ausschneiden. - Dichtung �D� auf den Rand des Ausschnitts legen und die Verbindungsstellen übereinander legen. - Kochmulde umdrehen und die Pla ¨ttchen �A� in die vorgesehenen Sitze mit den Schrauben �B� anbringen; die Schrauben nur um einige Drehungen anschrauben. Die Pla ¨ttchen genau nach der seitlich aufgeführten Abbildung montieren. Die Pla ¨ttchen drehen, um den Einsatz der Kochmulde in den Ausschnitt nicht zu verhindern. - Die Kochmulde in den Ausschnitt einsetzen und richtig positionieren. - Pla ¨ttchen �A� richtig positionieren; der Flügel �C� der Pla ¨ttchen� mu� in das entsprechende Loch gesetzt werden ko ¨nnen. - Schrauben �B� festschrauben, um die Kochmulde endgültig zu befestigen. - Mit einem scharfen Messer die überflüssige Dichtung �D� abschneiden, die aus der Kochmulde ragt.
A A
A A
C
D
20 mm min.
B
A
40 mm max.
9
|
|
 |
> |
|