|
|
|
Categories
|
|
Information
|
|
Featured Product
|
|
|
 |
|
|
There are currently no product reviews.
 ;
Хорошее качество сканирования.
Мануал пришел часов эдак через 12. В целом доволен.
 ;
Fantastic quality and impressive delivery time. Based on this manual, I recommend this service without hesitation! Five Stars for certain.
;
Was happy to find the complete owners manual... It's all in there, just like the original...
;
Thanks for offering this item at such a good price. Proved handy in identifying the part I was looking for my set.
;
Thr Video Recorder i have is quiet Old and the Producer could Not help me. So i w as very glad to find an offer for the owners Manual for a very fair Price.a I obtained the original Manual very quick and I am happy to have it now.
12
ENGLISH
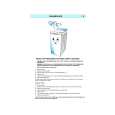
Cleaning Blender quick-cleaning operation
Always unplug the appliance before you start cleaning the motor unit. 1 Clean the motor unit with a damp cloth. Do not immerse the motor unit in water and do not rinse it either. Always clean the parts that have come into contact with food in hot water with washing-up liquid immediately after use.
C
1
Pour lukewarm water (not more than 0.5 litres) and some washing-up liquid into the blender jar. Assemble the lid. Let the appliance run for a few moments by pressing the Pulse button. (The appliance stops running when you release the button.) Detach the blender jar and rinse it with clean water.
2
2
C
3
� The bowl, the lid of the bowl, the pusher and the accessories can also be washed in a dishwasher. These parts have been tested for dishwasher resistance according to DIN EN 12875. The cover with insert storage space and the blender jar are not dishwasher proof! Clean the blade, the blade unit of the blender and the inserts very carefully. Their cutting edges are very sharp! Make sure that the cutting edges of the blade, the blade unit of the blender and the inserts do not come into contact with hard objects. This could cause them to become blunt. Certain ingredients may cause discolourations on the surface of the accessories. This does not have a negative effect on the accessories. The discolourations usually disappear after some time.
4
Storage MicroStore
C � Put the accessories (emulsifying disc, blade,
kneading accessory, insert holder) on the tool holder and store them in the bowl. Always end up with the insert holder.
C � Two inserts can be stored in the storage
space in the cover that covers the lid of the bowl, as indicated on the inside of the cover. The inserts have to be slid into the cover, not pressed.
|
|
|
> |
|