|
|
|
Categories
|
|
Information
|
|
Featured Product
|
|
|
 |
|
|
There are currently no product reviews.
 ;
Sweet! I won the item on eBay and couldn't adjust the geometry or even keep a steady picure. This guide has the full schematics (not available anywhere else as far as I could tell), and was a bargain for the wealth of knowledge it contains. I hooked it up to my testing equipment, tweaked a few potentiometers and got it playing videogames in no time. Thanks!
;
It was just what I need to fix my old BMW's CD player. Very convenient also. Thank you.
;
Great Manual! It contains all the wiring schematics and mechanical exploded views that are essential for service and repair. I was surprised I even found this for such an old machine. Only wish I knew of this site many years ago.
;
Great manual very clear copied. You are making an incredible job. I appreciate a lot the rapidity and your efficiency. Thanks a lot
;
Good pdf of the service manual for this unit. Includes disassembly instructions, full schematics, board layouts, parts lists and diagnostic information. Some information is in the pdf twice (single pages, and split pages), but that could be how it was originally generated by panasonic, or perhaps the idea is to make it eaiser to put onto 8.5 x 11" pages.
Information was exactly what I needed. Delivery was overnight (less than 12 hours) and I was happy with the process.
A
B
Level drop at the guide roller (supply side) C D
(3) Press the channel buttons (+, �) simultaneously to enter the manual tracking mode. This also brings tracking to the center (centre). (4) Adjust the AUDIO OUT waveform and Control pulse waveform by turning the screws (1), (2) and (3) little by little until both waveforms reach maximum. The screw (1) and (3) are for adjustment of tilt and the screw (2) for azimuth.
Head base
(2)
(1)
Level drop at the guide roller (take-up side)
Audio control head (3)
� Proper waveform variation: Always flat
AUDIO OUT � Improper waveform variation: Higher Lower CTL. P
Fig. 2-3-1c
Fig. 2-3-2a 2.3.3 Checking/Adjustment of the Audio Control Head Phase (X-Value)
Signal (A) [HR-J686EN] � Alignment tape(SP, stairstep, PAL) [MHPE]
Improper
Proper
(a) Guide roller
---------------------------------[HR-J686M] � Alignment tape(SP, stairstep, NTSC) [MHP]
(A) Mode Equipment Measuring point
(b) Guide pole
(B) (C) (D) (E) (F) (G) (H)
External trigger Adjustment part Specified value
Fig. 2-3-1d 2.3.2 Checking/Adjustment of the Height and Tilt of the Audio Control Head Note: � Set a temporary level of the height of the A/C head in advance to make the adjustment easier after the A/C head has been replaced. (See Fig.2-2-6c.)
Signal (A) (A) Mode Equipment Measuring point External trigger Adjustment part Specified value (B) (C) (D1) (D2) (E) (F) (G) [HR-J686EN] � Alignment tape(SP, stairstep, PAL) [MHPE]
Adjustment tool
� PB � Oscilloscope � TP106 (PB. FM) � TP111 (D.FF) � A/C head base [Mechanism assembly] � Maximum V.PB FM waveform � A/C head positioning tool [PTU94010]
---------------------------------[HR-J686M] � Alignment tape(SP, stairstep, NTSC) [MHP]
(1) Play back the alignment tape (A1). (2) Apply the external trigger signal to D.FF (E), to observe the V.PB FM waveform at the measuring point (D). (3) Press the channel buttons (+, �) simultaneously to enter the manual tracking mode. This also brings tracking to the center (centre). (4) Loosen the screws (4) and (5), then set the A/C head positioning tool to the innermost projected part of the A/ C head. (See Fig. 2-3-3a.) (5) Turn the A/C head positioning tool fully toward the capstan. Then turn it back gradually toward the drum and stop on the second peak point position of the V.PB FM waveform output level. Then tighten the screws (4) and (5). (6) Perform the tracking operation and make sure that the V.PB FM waveform is at its maximum. If it is not at maximum, loosen the screws (4) and (5), and turn the A/C head positioning tool to bring the A/C head to a position, around where the waveform reaches its maximum for the first time. Then tighten the screws (4) and (5).
� PB � Oscilloscope � AUDIO OUT terminal � TP4001 (CTL. P) � TP111 (D.FF) � A/C head [Mechanism assembly] � Maximum waveform
(1) Play back the alignment tape (A). (2) Apply the external trigger signal to D.FF (E), to observe the AUDIO OUT waveform and Control pulse waveform at the measuring points (D1) and (D2) in the ALT mode. 2-17
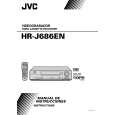 $4.99 HRJ686M JVC
Owner's Manual Complete owner's manual in digital format. The manual will be available for download as PDF file aft…
|
|
|
> |
|