|
|
|
Categories
|
|
Information
|
|
Featured Product
|
|
|
 |
|
|
There are currently no product reviews.
 ;
Veramente completo, dettagliato e perfetto nella visione. Perfect, thanks!
 ;
Fully functional usable service manual. Considering the age of the manual and device quality was better than expected
;
Thank you very much, I've been very happy to find this manual on "Owner Manual". It's a perfect copy and it has been really useful for my work!
;
It took about 24-hours after my payment before I was able to get to the download. Apparently, payment processing is not 100% automated. That is no big deal, just be aware of that going in.
After I got to it, it was in good shape, easy to read, etc. Not some cheap FAX copy looking thing.
Also, this site was the cheapest I found. Another Plus!
;
Good price, very legible manual, exactly what I needed -- but had to wait a day to actually get the download of the manual. Would have preferred to download it immediately after payment rather than waiting for someone to "process" my order. I was surprised that I had to wait that long.
9-1. Laser diode The laser diode terminals are shorted for transportation in order to prevent electrostatic damage. After replacement, open the shorted circuit. When removing the pickup from the mechanism, short the terminals by soldering them to prevent this damage. 9-2. Actuator The actuator has a powerful magnetic circuit. If a
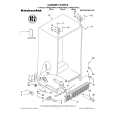
DVD changer CD
magnetic material is put close to it. Its characteristics will change. Ensure that no foreign substances enter through the ventilation slots in the cover. 9-3. Cleaning the lens Dust on the optical lens affects performance. To clean the lens, apply a small amount of isopropyl alcohol to lens paper and wipe the lens gently.
SYSTEM CHECK
The first time this unit is turned on after the wire connections are completed, it must be checked what equipment is connected. When the power is turned on, �SYSTEM CHK� and �Push POWER�appear in the display alternately, so press the [FUNC] button. The system check starts within the unit. When the system check is complete, press the [FUNC] button again.
Digital wiring
When the optical digital cable is connected to or disconnected from this set later, press the function button while holding down direct buttons [1] and [6] with the power OFF to perform a system check. Though pressing the reset button also performs a system check, the contents of memory will be erased completely in this case.
ERROR DISPLAYS
If an error occurs, one of the following displays is displayed. Take the measures described below to eliminate the problem.
Error Display ERROR 2 ERROR 3 ERROR 2 ERROR 3 Cause A CD is caught inside the CD deck and is not ejected. A CD cannot be played due to scratches,etc. A CD inside the CD changer is not loaded. A CD inside the CD changer cannot be played due to scratches, etc. A CD inside the CD changer cannot be played because it is loaded upside-down. A DISC inside the DVD changer cannot be played. A DISC cannot be played due to scratches,etc. A DISC inside the DVD changer cannot be played because it is loaded upside-down. Parental level error Region code error Measure This is a failure of CD deck's mechanism. Replace with a non-scratched,non-warped-disc. This is a failure of CD changer's mechanism. Replace with a non-scratched, non-warped disc.
ERROR 6
Eject the disc then reload it properly.
ERROR 2 ERROR 3 ERROR 6
This is a failure of DVD mechanism. Retry or replace with a non-scratched, non-warped-disc. Eject the disc then reload it properly.
ERROR P ERROR R
Set the correct Parental level. Eject the disc and replace correct region code disc.
If an error display other than the ones described above appears, press the reset button. Reset button
-3-
DRZ9255 HX-D2
|
|
|
> |
|