|
|
|
Categories
|
|
Information
|
|
Featured Product
|
|
|
 |
|
|
There are currently no product reviews.
 ;
The manual describes this product very good. It has the basic things to know and also a more detailed look. Very well made!
;
An excellent document to assist in the repair of my old personal tape player. It includes full circuit diagrams and physical layout drawings and full instructions on disassembly and fault finding.
Well worth the meagre price.
;
Very good conversation, Pretty fast Service, wood do it again,
Have paid by Paypal, so i got the Service Manual online after 15 Min.
Very helpfully.
Greeting from Germany,
Hans
;
Good-quality scans. Detailed description. I hope I can repair the machine.
;
High-quality scanning. Detailed description. Recommend for all technician. A+++
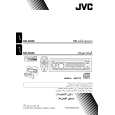
2
ENGLISH
General settings � PSM
You can change PSM (Preferred Setting Mode) items listed in the table that follows.
Indication [Range]
BAS*1 (bass) Adjust the bass. [�06 to +06] TRE*1 (treble) Adjust the treble. [�06 to +06] FAD*2 (fader) Adjust the front and rear speaker balance. [R06 to F06] BAL*3 (balance) Adjust the left and right speaker balance. [L06 to R06] LOUD*1 (loudness) Boost low and high frequencies to produce a well-balanced sound at low volume level. [LOUD ON or LOUD OFF] SUB.W*4 (subwoofer) Adjust the subwoofer output level. [00 to 08] VOL (volume) Adjust the volume. [00 to 30 or 50*5] *1 When you adjust the bass, treble, or loudness, the adjustment you have made is stored for the currently selected sound mode (C-EQ) including �USER.� *2 If you are using a two-speaker system, set the fader level to �00.� *3 This adjustment cannot affect the subwoofer output. *4 This takes effect only when a subwoofer is connected. Displayed only when �L/O MODE� is set to �WOOFER� (see page 13). *5 Depending on the amplifier gain control setting. (See page 13 for details.)
1 2
Select a PSM item.
3
Adjust the PSM item selected.
Ex.: When �DIMMER� is selected
4 5
Repeat steps 2 and 3 to adjust other PSM items if necessary. Finish the procedure.
12
|
|
|
> |
|