|
|
|
Categories
|
|
Information
|
|
Featured Product
|
|
|
 |
|
|
There are currently no product reviews.
 ;
Very satisfied with received document, all is right, Thank You very much, it was a Pleasure to work with You.
 ;
great site, the most easy and fastest way to find the manual you need, no 5 star because the manual was only available in german, but I speak german as well so no problem for me.
;
thanks for this download i got a pioneer bdp-lx70a blu-ray player and it had no manual i search everywhere on the internet and came across owner-manuals.com and i found that it was so easy to find and downloaded from this site if i ever need a manual again this would be the first place that i would come too thanks guys
;
Superb! It's the original manual. We can now use our old calculator with its full function.
;
This is a very well written and comprehensive manual. It answered all our queries.
Changing the display mode while listening to an FM station
You can change the initial indication on the display to station name (PS NAME), station frequency (FREQ), or clock time (CLOCK) while listening to an FM RDS station.
Setting the TA volume level
You can preset the volume level for TA Standby Reception. When a traffic programme is received, the volume level automatically changes to the preset level.
1 Press and hold SEL (select) for more than 2
seconds so that one of the PSM items appears on the display. (See page 23.) 2 Press ¢ or 4 to select �TA VOL� (volume). 3 Press + or � to set to the desired volume. You can set it from �VOL 00� to �VOL 50.� 4 Press SEL (select) to finish the setting.
1 Press and hold SEL (select) for more than 2
seconds so that one of the PSM items appears on the display. (See page 23.) 2 Press ¢ or 4 to select �DISPMODE� (display mode). 3 Press + or � to set to the desired indication (�PS NAME,� �FREQ,� or �CLOCK�).
4 Press SEL (select) to finish the setting.
Note: By pressing DISP (display), you can change the display while listening to an FM RDS station. Each time you press the button, the following information appears on the display:
Automatic clock adjustment
When shipped from the factory, the clock built in this unit is set to be readjusted automatically using the CT (Clock Time) data in the RDS signal. If you do not want to use automatic clock adjustment, follow the procedure below.
Station name (PS NAME) Station frequency (FREQ) Programme type (PTY) Clock (CLOCK)
1 Press and hold SEL (select) for more than 2
seconds so that one of the PSM items appears on the display. (See page 23.) 2 Press ¢ or 4 to select �AUTO ADJ� (adjustment). 3 Press � to select �OFF.� Now automatic clock adjustment is canceled. 4 Press SEL (select) to finish the setting. To reactivate clock adjustment, repeat the same procedure and select �ON� in step 3 by pressing +.
� Then, the display goes back to the original indication in several seconds.
Note: You must stay tuned to the same station for more than 2 minutes after setting �AUTO ADJ� to �ON.� Otherwise, the clock time will not be adjusted. (This is because the unit takes up to 2 minutes to capture the CT data in the RDS signal.)
15
ENGLISH
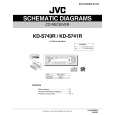
 $4.99 KD-S741R JVC
Parts Catalog Parts Catalog only. It's available in PDF format. Useful, if Your equipment is broken and You need t… 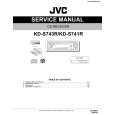 $4.99 KDS741R JVC
Service Manual Complete service manual in digital format (PDF File). Service manuals usually contains circuit diagr…
|
|
|
> |
|