|
|
|
Categories
|
|
Information
|
|
Featured Product
|
|
|
 |
|
|
There are currently no product reviews.
 ;
So usefull to make my installation a breeze. 5 stars on quality.
;
very helpful, the information in these manuels are very detailed
;
Please tell us what you think and share your opinions with others. Be sure to focus your comments on the product. You will receive $2.00 of store credit for Your review.
;
Please tell us what you think and share your opinions with others. Be sure to focus your comments on the product. You will receive $2.00 of store credit for Your review.
;
Good copy and great customer service! There was some confusion with my order and it was resolved promptly!
U sing and Caring for Your Oven
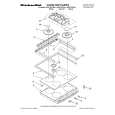
Using and replacing the oven light(s)
Your oven may have a standard oven light or two side halogen lights. The oven light(s) will come on when you open the oven door. To turn the light(s) on when the oven door is closed, press the Oven Light pad on the control panel. Press the pad again to turn off the light(s).
OVEN LIGHT OVEN LIGHT
Replacing oven lights (models with side halogen lights):
1. Unplug range or disconnect power. 2. Make sure the oven is cool before replacing the light bulb.
Replacing the oven light (models with light on back wall):
1. Unplug range or disconnect power. 2. Make sure the oven is cool before replacing the light bulb. 3. Remove glass light cover by grasping front edge of cover and pulling it away from the side wall of the oven. 4. Remove the light bulb from its socket. Replace the bulb with another halogen bulb (12 volt, 5 watt maximum, available at most hardware stores). 5. Replace the light cover by snapping it back into wall. 6. Plug in range or reconnect power. NOTE: The oven lights will not work during the Self-Cleaning cycle.
3. Remove the glass bulb cover in the back of the oven by turning it counterclockwise. 4. Remove the light bulb from its socket. Replace the bulb with a 40-watt appliance bulb. 5. Replace the light bulb cover by turning it clockwise. The light bulb cover must be in place when using the oven. The cover protects the bulb from breaking and from high oven temperatures. 6. Plug in range or reconnect power. NOTE: The oven light will not work during the Self-Cleaning cycle.
59
|
|
|
> |
|