|
|
|
Categories
|
|
Information
|
|
Featured Product
|
|
|
 |
|
|
There are currently no product reviews.
 ;
Having bought a pre-owned Sony FM stereo tuner through eBay, it came without any manuals. It soon became clear that to get the best from this excellent tuner I needed a decent manual because much of the operation was not intuitive to a newboy to hi fi like me. I managed to download the official Sony multi-lingual manual from Owner-Manuals.com with no problem at all - a really quick and easy service. I'm very glad I did because I found out all the operations of the tuner and was then able to not only set it up quickly but also to get much more from it that poke-and-hope trialling would ever achieve. In my book $4.99 very well spent.
;
This manual is immaculate in it's accuracy. Everything is written very clearly and easy to understand. Written by a professional who wants to convey a clear and easy to understand message!!
;
This Manual (as downloaded) is both informative and comprehensive and has proved to be extremely useful. thoroughly recommended.
;
everything is ok, thank you very much! Product is good, no problems with download!
;
Great site, I always find all the manuals I need and i can't find anywhere else. PDF for the Sony PCM 3348 is complete and scan is good quality. Thank you!
]ö Conversion to alternative types of gas ]ö
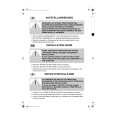
Conversion to alternative types of gas After conversion After converting the gas cooktop to an alternative type of gas, place the label supplied with the jet kit on the data plate over the type of gas being used. Check that there are no leaks. Check that the burner is correctly assembled. Turn on the gas supply. Turn on the electrical supply. Light the burner: Important note: When reassembling, it is important to ensure that the profile b of the control panel grips the appropriate c on the lower housing. moulding Screw the three screws into the burner base using a suitable philipeshead screwdriver. Put the large burner cap base, the burner ring, the large burner cap and the wok/pan support in place. Check that the tab of the large burner cap is correctly positioned in the notch of the base and that the lug of the base is correctly positioned in the notch of the housing. When set at �low�, or when the control knob is quickly turned from �high� to �low� the flame should not go out. When set at �high�, the inner cone of the gas flame should be clearly visible.
36
|
|
|
> |
|