|
|
|
Categories
|
|
Information
|
|
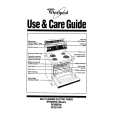
Featured Product
|
|
|
 |
|
|
There are currently no product reviews.
 ;
Very good scan quality, only PC Board scan not enough contrast.
;
First of all I must say that I received the manual in just a few minutes after placing the order. The copy is well done and very readable. I will buy others soon... Thanks, Meyer
 ;
Good service manual. I gat all I want. Copy is good, but could be better. All clear and useful. I sincerely recommend.
;
The schematic is very helpful and the images are very good.The schematic is very helpful and the images are very good.The schematic is very helpful and the images are very good.The schematic is very helpful and the images are very good.The schematic is very helpful and the images are very good.The schematic is very helpful and the images are very good.
;
Welcome. The scheme is clearly helped me to repair. Worth to download it.
REMOVAL AND REPLACEMENT OF THE MAIN-BRACKET BOTTOM PLATES. (1) REMOVING THE PLATES
In the event of servicing being required to the solder side of the D Board printed circuit, the bottom plates fitted to the main chassis bracket require to be removed. This is performed by cutting the gates with a sharp wire cutter at the locations shown and indicated by arrows. Note : There are 5 plates fitted to the main bracket and secured by 4 or 6 gates. Only remove the necessary plate to gain access to the circuit board.
For safety reasons, on no account should the plates be removed and not refitted after servicing.
(2) REFITTING THE PLATES
Because the plates differ in size it is important that the correct plates are refitted in their original location. The plates are identified by markings A-B-C-D-E on their top side. 1. 2. 3. 4. Identify the plate by locating its marking. Turn the plate over noting where the marking is located. Locate the corresponding marking indicated on the main chassis bracket. See Fig 2. Refit the plate as indicated in Fig 3 with the markings located next to each other.
FOR SAFETY REASON THIS PLATE MUST BE REMOUNTED AFTER CUTTING AND TAKING AWAY.
Fig 1
E
Fig 2
INDEX MARKING AT BRACKET FRAME
MAIN BRACKET
In the event of the plates requiring to be removed at a later stage, this can be achieved by inserting a screwdriver in the snap-recess indicated as in Fig 4 and lifting out.
INSERT FROM THE BOTTOM SIDE
Fig 3
Fig 4
ATTENTION D
ATTENTION
FOR SAFETY REASON THIS PLATE MUST BE REMOUNTED AFTER CUTTING AND TAKING AWAY.
FOR SAFETY REASON THIS PLATE MUST BE REMOUNTED AFTER CUTTING AND TAKING AWAY.
19
KV-28WF3/32WF3
|
|
|
> |
|