|
|
|
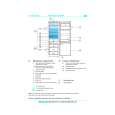
Categories
|
|
Information
|
|
Featured Product
|
|
|
 |
|
|
There are currently no product reviews.
 ;
This service manual was determinant to enable to fix my Alpine Amplifier. I am pleased with my purchase. For a 5 star rating I would like to see a higher resolution scan of the printed circuit board lay-out because the gray scale grafics was dificult to see. Also some schematic diagrams were scanned at a slight angle. Never the less, it had all information I needed to troubleshoot and service my equipment.
 ;
Complete manual, the good quality of reproduction allows enlarged print-out of the schematic diagram in the size it probably had in the original print edition and which is necessary for practical use.
;
The service manual was complete and the components on the drawings very good visible.
;
downloaded next day , manual is very helpful , fast and easy
;
This Service Manual was exactly what I needed to repair my Philips TV. The purchase was convenient and I received the manual at the same day I paid for it.
The operating instructions mentioned here are partial abstracts from the Operating Instruction Manual. The page numbers of the Operating Instruction Manual remain as in the manual.
SECTION 1 GENERAL
Using Your New TV
Getting Started
Step 1
Connect the antenna
If you wish to connect a VCR, see the �Connecting a VCR� diagram below.
Notes � If you connect a monaural VCR, connect the yellow plug to VIDEO (the yellow jack) and the black plug to AUDIO-L (MONO) (the white jack). � If you connect a VCR to the � (antenna) terminal, preset the signal output from the VCR to the program position 0 on the TV. � Do not simultaneously connect video equipment to the VIDEO 3 INPUT jacks at the front and the VIDEO IN 3 jacks at the rear of your TV. � If both S1 VIDEO and VIDEO of VIDEO IN 1 are input simultaneously, the S1 VIDEO is automatically selected. To view the video input to VIDEO IN 1, disconnect the S video cable. � When no signal is input to the connected VCR (or video equipment), the screen becomes blue.
Using Your New TV
Antenna connector (not supplied) or Antenna cable (supplied)
Step 2
Insert the batteries into the remote
� 4 �
Connecting a VCR
To antenna output VCR
VIDEO IN VIDEO OUT
Antenna cable (not supplied)
Note � Do not use old batteries nor use different types of batteries together.
: Signal flow
Step 3
Preset the channels
Notes � When you use the TV for the first time, preset the channels by pressing AUTO PROGR button inside the front cover.
Antenna cable (not supplied)
Antenna cable (supplied)
� PRESET menu beforesystem, select �CABLE : ON��Changing If you use a cable TV presetting the channels. (See of the other PRESET menu options� on page 30.)
1
MAIN POWER
MAIN POWER
VIDEO 3 INPUT
To � (antenna)
AUDIO VIDEO
VIDEO IN
MON/TV OUT
VIDEO
S1 VIDEO
VIDEO
(MONO)
AUDIO
ONE-PUSH AUTOMATIC PROGRAMING
S video cable (not supplied) To S video output
S1 VIDEO
L(MONO) AUDIO R
2
AUTO PROGR
1
1
To video and audio outputs
To S1 VIDEO
To VIDEO IN 1, 2, or 3 VIDEO (yellow) AUDIO-L (MONO)(white) AUDIO-R (red) : Signal flow
AUTO PROGRAM
Audio/Video cable (not supplied)
Now You Are Ready. . .
The channels are now automatically preset in your TV. To preset the channels manually, see �Adding or erasing channels� on page 28.
Using Your New TV
4
Using Your New TV
5
|
|
|
> |
|