|
|
|
Categories
|
|
Information
|
|
Featured Product
|
|
|
 |
|
|
There are currently no product reviews.
 ;
have download a number of manuals todate , most are excellant, one or two sometimes a little difficult to read but a least avaialable, great site .
Brad.
;
Excellent had everything I wanted, very happy with purchase
 ;
This service is relatively cheap, document is fast available, schematic is readable.
Thanks.
;
So far I´m a satisfied customer. I have only downloaded "TECHNICS SX-KN470 Service Manual" maybe I will use it later.
Best regards
Peter
;
Good manual. It is complete and of high quality, both text and graphics. The schematics are with the original big size, so it can be viewed or printed without any loss of resulution and sharpness.
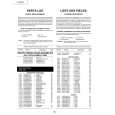
LC-20A2U 4. Getting Initialized 4-1. Connect pins (81) and (82) of IC2001 to GND. Turn on the power. 4-2. Select the model number (A2U). 4-3. Select the screen size (20 inches). Note: This procedure is needed only when the IC2001 or IC2004 (EEPROM) has been replaced. 5. Adjustments 5-1. +B adjustment (+B ADJ. on page 1) 1) Receive the color bar signal. 2) Adjust the voltage at pin (8) of P303 to 5.00 ±0.02 V. Note: The 5.00 V level is used as reference to the supply voltage. Make an exact adjustment to 5.00 V. 5-2. Counter bias adjustment ...... �COM BIAS� on page 2 1) Adjust the COM BIAS setting until the contrast becomes maximum (down to the darkest black). 5-3. White balance adjustment 1) Receive the monoscope pattern signal. 2) Adjust so that the �RCUTOFF� and �BCUTOFF� settings on page 2 of the adjustment process are optimum. Note: The �RCUTOFF� and �BCUTOFF� settings in the adjustment process should be in the range of -10 thru +10. If without this range, the variable user control range will be reduced. 6. Factory Settings Holding down the �TV/VIDEO� and �MENU� keys of the set at once, turn on the main power (make sure �K� appears at the top left of the screen). Then keep pressing the �CH '� and �VOL +� keys at once until �SETTING COMPLETE� appears at the center of the screen. Note: Just after the factory settings have been made, turn off the power switch. (The next time the power is switched on, the set is designed to get started in the EZ SETUP mode. If any other key is activated after making the factory settings, the set may fail to function as specified.)
15
|
|
|
> |
|