|
|
|
Categories
|
|
Information
|
|
Featured Product
|
|
|
 |
|
|
There are currently no product reviews.
 ;
The schematic is very helpful and the images are very good.The schematic is very helpful and the images are very good.The schematic is very helpful and the images are very good.The schematic is very helpful and the images are very good.The schematic is very helpful and the images are very good.The schematic is very helpful and the images are very good.
;
Welcome. The scheme is clearly helped me to repair. Worth to download it.
 ;
Excellent manual, very clear, technical specification provided, useful information regarding adjustment and set up.
;
fast and easy and exactly what I was looking for. Not the cheapest but value for money after all.
;
The manual for the Sansui P-L75 was not one of the more informative turntable manuals around but for $5 it was helpful enough.
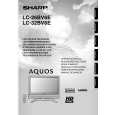
LC-26GA6E/LC-26BV6E LC-26GA5E LC-32GA6E/LC-32BV6E LC-32GA5E LC-37GA6E
7. Disconnect all the connectors from all the PWBs. 8. Remove the MAIN, HDMI and COMPONENT PWBs. 8-1. Remove the 3 lock screws 9 and the 2 lock screws 0. Detach the Chassis Frame. 8-2. Remove the 8 lock screws q and detach the MAIN PWB and HDMI/COMPONENT unit. 8-3. Remove the 4 lock screws w and detach the COMPONENT PWB from HDMI PWB. 9. Remove the 2 lock screws e and detach the R/C,LED PWB 10. Remove the 3 (LC-26GA6E) / 6 (LC-32GA6E) lock screws r and detach the INVERTER GND PWB. 11. LC-26GA6E : Remove the 4 lock screws t and detach the INVERTER PWB. LC-32GA6E : Remove the 8 lock screws t and detach the INVERTER-A and INVERTER-B PWBs. 12. Remove the 6 lock screws y and detach the LCD CONTROLLER PWB and Heat Sink. 13. Remove the 6 lock screws u and detach the POWER PWB. 14. Remove the 2 lock screws i and detach theSP BOX (L) and (R). (LC-26GA6E only)
CN7601 P2207 SC4651 SC4652 SC4601
SC2001 P2205 P2206 P7704
P2006
P7707
P7705
CN704 CN706
P2201 P1001 P1006 CN707
P1401
P1003 P1301
P1901 P2103 P2102
P1902 P2101
P4001
8
|
|
|
> |
|