|
There are currently no product reviews.
 ;
Again very good service manual, this time very fast download. AAAAA+
;
Ckear manual, well reproduced with plenty of overlap on critical pages.
;
I buy the service manual cheaper here than in elsewhere.Am happy with this site. I recommended the Owner-Manuals.com
;
Great Manual. It was exactly what I was looking for
;
Great Manual. It was exactly what I was looking for
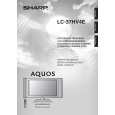
LC-37HV4E
REMOVING OF MAJOR PARTS
1.Take off the center and lower terminal covers. 2.Remove the two speaker fixing screws each and the speaker connecting terminal, and take off the speaker. 3.Remove the four stand fixing screws and take off the stand. 4.Remove the 19 cabinets A/B fixing screws and take off the cabinet B. 5.Remove the two Key PWB assembly fixing screws and the connector, and take off the Key PWB assembly. 6.Remove the Key PWB insulating sheet fixing screw and take off the Key PWB insulating sheet. 7.Remove the four Main PWB shield fixing screws and take off the Main PWB shield. 8.Remove the four stand angle fixing screws and take off the stand angle.
4
Speaker (right) 2
4
1
3 4
Terminal cover (center) Stand Terminal cover (lower) 2 Speaker (left)
5
Key PWB assembly 7
6
P152
P151
Main PWB shield Key PWB insulating sheet
Stand angle 8
12
|