|
|
|
Categories
|
|
Information
|
|
Featured Product
|
|
|
 |
|
|
There are currently no product reviews.
 ;
Finding the owners manual for my Pioneer CRWM62R is greatly appreciated. I had searched several other web sites with no success. Although my manual was not listed on your site for immediate download, I recevied an email within a few hours that my ower's manual was posted for me. I had no difficulty downloading the manual for my 20 year old multi-cassette player. Owner Manuals provides a service that is valuable, easy-to-use, accurate , efficient, and priced fairly. I thank you.
;
Excellent manual - just what I needed. Although currently available only in German, their are lots of pictures which makes it all very clear.
;
PHILIPS PE1642 Owner's Manual
Hi,
you have complet fullfilled my expectance.
Price is OK.
Robert Schmid
 ;
Came in the mail within a few hours. Gave clear instruktion on maintaines. Is of great use to have this manual in house
;
Easy to access. Clear instructions. No problems. Printed fine.
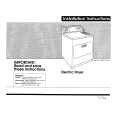
Using
the drying
on
rack
3. Close the door.
(available as an option some models)
To order the drying rack (Part #692990), call: l-800-253-1301. You will hear a recording. Follow the steps to place an order. The drying rack lets you dry items that you may not want to tumble. The rack does not move, but the drum turns. 1. Fit rear legs of the rack into indentations in the back wall of the dryer. Lower the front so the legs rest on the dryer opening.
4. Select the Timed Drying cycle (and temperature, if desired), or the Fluff Air cycle (see page 8). Drying time depends on the amount of moisture in the items. 5. Push the Start Button.
2. Put wet items on top of the rack. Leave space between the items so air can reach all surfaces. NOTE: Make sure nothing hangs over the edge of the rack.
NOTES:
l
l
l
l
See the chart below for suggested cycles and settings for the different types of items that might best be rack dried. The rack must be removed for normal tumbling. Drying time will depend on how much moisture the items hold. The following chart suggests drying times. Automatic cycles do not work with the drying rack. TEMPERATURE LOW or EX LOW TIME* (minutes) 60
I
RACK DRY
I
CYCLE Timed Drying
Wool sweaters (Block to shape and lay flat on the rack) Stuffed toys or pillows (Cotton or polyester fiber filled) Stuffed toys or pillows (Foam rubber filled) Sneakers or canvas shoes
l
Fluff Air
None; cycle is unheated.
90 30-40
Reset cycle as needed to complete drying.
11
|
|
|
> |
|