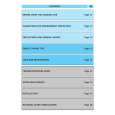
|
There are currently no product reviews.
 ;
I have never bought a service manual which is as competely readable as this althogh it was a scanned pdf. Thank you for this succesful manual also cheaper than other sites.
;
Thanks for a very good and readable servicemanual. Just what I needed as a "dinosaur technician". I really recommmend this site and will come back.
Åsbjörn
;
The manual I purchased was just what I needed. I was glad to find a site where I can find so many manuals on a wide variety of products.
;
The best diagram that I used in a long time. Everything was right on te money. It was easy and fast. Iwoiuld but again when I need a service manual.
;
The manual is great help for me, i'm happy to have it,thanks
CHAPTER 3. DISASSEMBLY AND ASSEMBLY
1. STAND UNIT REMOVAL
1) Remove the rear cover (A) by sliding it upward. 2) Remove the screws, and remove the stand unit (B). 3) Remove all the connectors and flat cables on the PWB. 4) Remove the hex. screws, washer and screws, and remove the I/F PWB by sliding it upward.
A
B
3. P/I PWB REMOVAL
1) Remove the connector covers (A), and remove all the connectors on the PWB. 2) Remove the screws, and remove the P/I PWB (B).
2. I/F PWB REMOVAL
1) Remove the screws, and remove the rear cabinet.
A
B A
4. LCD UNIT REMOVAL
1) Remove the screws, and remove the front cabinet (A). 2) Remove the screws, and remove the LCD unit (C) from the bracket panel (B).
A
2) Remove the screws, and remove the shield by sliding it upward.
C
B
LL-T17A4-H/B
DISASSEMBLY AND ASSEMBLY
3�1
|