|
|
|
Categories
|
|
Information
|
|
Featured Product
|
|
|
 |
|
|
There are currently no product reviews.
 ;
Absolutely perfect! I've been trying to understand how to use all or at least some of the features of the receiver and especially the remote.
;
Copy of genuine owners/operators manual, very useful
;
The manual was a perfect match and was exactly what I was looking for. I'm very satisfied with my purchase.
;
Thank you for having the manual I needed for an older model Aiwa stero I had found on Ebay --- I wanted the Aiwa because I had tapes and cd's but I did not have a manual as to how to operate the system... I found what I needed and it has enabled me to set the system up for my enjoyment.
;
I wished detailed information of the JBL S310 and here I found it! Very happy with the service from this site!
CD Player
Playing a CD
This CD player plays Audio Discs including CD-Recordables (CD-R). � CD-RWs, MP3 CD-ROMs, CD-I, CDV,VCD, DVD or computer CDs are not possible for playback. Adjust FUNCTION to CD. Open the CD door, and insert a CD/ CD-R with the printed side facing up and press the CD door gently close. � Display shows -- and later, the total number of tracks. (See 3) 3 4 5 6 Press 2; on the set to start playback. To pause playback press 2;. � Display: PLAY flashes. (See 4) To resume, press 2; again To stop CD play, press 9. 5 4 1
CD /Cassette Recorder
numbers
You may store up to 20 tracks in the desired sequence. If you like, store any track more than once. In the stop position, press PROG to activate programming. � Display: PROG and 00 flashes. (See 5) Press � or § to select your desired track number. 3 Press PROG to store the desired track number. � Display: PROG and 00 flashes for you to program the next track.. Repeat steps 2 to 3 to select and store all desired tracks in this way. � If you attempt to store more than 20 tracks, no track can be selected and the display shows --. To play your program, press 2;. 1 2
Cassette Recorder
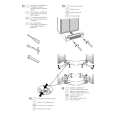
� General information on recording Recording is permissible insofar as copyright or. other rights of third parties are not infringed. For recording, use only NORMAL type cassettes (IEC type I) on which the tabs have not yet been broken.This deck is not suited for recording on CHROME (IEC II) or METAL (IEC IV) type cassettes. The best recording level is set automatically. Altering the VOL or BASS BOOST will not affect the recording. To protect a tape from accidental erasure, break out the tabs. If you wish to record again, cover the tabs with a piece of adhesive tape. Recording from the CD Player Select CD source. Insert a CD and if desired, program track numbers. Press 9// to open the cassette holder. Insert a blank tape and close the deck. Press 0 REC to start recording. Press 2; on the set to start CD playback. For brief interruptions press ;. To resume recording, press ; again. To stop recording, press 9//. Recording from the Radio Select RADIO source. Tune to the desired radio station (see Radio reception). Follows steps 3, 4, 6,7 under Recording from the CD Player. Making your recording Select TAPE source. Follows steps 3-4 under Recording from the CD Player. Speak towards the built-in microphone (located on the right speaker, see 1). Follows steps 6-7 under Recording from the CD Player.
Different play modes: REP. and REP. A (See 6, 7)
You can select and change the play modes before or during playback, and combine the modes with PROG. REP. � plays the current track continuously. REP. A � repeats the entire CD/program 1 To select play mode, press REPEAT once or more. 2 Press 2; to start playback if in the stop position. 3 To return to normal playback, press REPEAT repeatedly until the modes are no longer displayed. � You can also press 9 to cancel your play mode.
�
1 2
2
�
�
1 2 3 4 5 6 7
Helpful hints : CD play will also stop when: � you open the CD compartment; � you select RADIO or TAPE/ OFF sound source; � the CD has reached the end.
Cassette playback
Adjust FUNCTION to TAPE/ OFF. Press 9STOP//EJECT to open the cassette holder and insert a cassette and close the deck. 3 4 5 Press 1PLAY to start playback. To pause playback press ; PAUSE. To resume, press the key again. By pressing 5F.FWD/ REW6 , fast winding of the tape is possible in both directions. 6 To stop fast winding, press 9//. To stop the tape, press 9//.
Helpful hints :
� When playback of your program comes to
the stop position, your set will return to normal playback.To re-enter program mode, press PROG in the stop position.
Selecting a different track
� Press � or § once or repeatedly until the desired track number appears in the display. � In the pause/stop position, press 2; to start playback.
Reviewing the program
In the stop position, press PROG repeatedly to see your stored tracks.
1 2 3
Erasing a program Finding a passage within a track
1 During playback, press and hold � or § . � The CD is played at high speed. 2 When you recognize the passage you want, release � or § to resume normal playback. Helpful hints : When searching within a final track and you reach the end of the last track, the CD goes to stop mode. You can erase the contents of the memory by: � selecting TAPE/ OFF or RADIO sound source; � opening the CD door; � in the stop position, press PROG to enter program mode and then, press 9.
Helpful hints: � During playback, the keys are automatically released at the end of a tape and the set is switched off (unless ; PAUSE mode has been activated.) � During fast forwarding/rewinding, the keys will not be released at the end of a tape. To switch off the set, make sure the cassette keys are also released.
1 2 3 4
Programming track
|
|
|
> |
|