|
|
|
Categories
|
|
Information
|
|
Featured Product
|
|
|
 |
|
|
There are currently no product reviews.
 ;
Great manual, would not have been able to operate my machine without it!!
James Dawson August 18, 2012
;
excellent value & price! Includes everything you need to know about the NN-C777! I would buy this again.
;
Very satisfied! I was searching for several days, but nope; till I discovered your webside and there it was at a very reasonable price. Keep up the good work!
Paul
Flanders
 ;
Generally speaking good copy; a few pages too hard contrast...
Good service and communication.
;
I purchased the unit from a private party and the original owners manual was not available. Having the ability to download it was extremely helpful and clarified operating the equipment immensely. This is a complicated unit and without the manual I would not have been able to maximize it's potential. Thank you.
5-5. TEMPERATURE COMPENSATION OFFSET ADJUTMENT
Save the temperature data at that time in the non-volatile memory as 25 �C reference data. Note : 1. Usually, do not perform this adjustment. 2. Perform this adjustment in an ambient temperature of 22 �C to 28 �C. Perform it immediately after the power is turned on when the internal temperature of the unit is the same as the ambient temperature of 22 �C to 28 �C. 3. When D101 has been replaced, perform this adjustment after the temperature of this part has become the ambient temperature. Adjusting Method : 1. Rotate the AMS knob and display �TEMP ADJUST�. 2. Press the YES button and select the �TEMP ADJUST� mode. 3. �TEMP = � and the current temperature data will be displayed. 4. To save the data, press the YES button. When not saving the data, press the NO button. 5. When the YES button is pressed, �TEMP = SAVE� will be displayed and turned back to �TEMP ADJUST� display then. When the NO button is pressed, �TEMP ADJUST� will be displayed immediatelly. Specified Value : The �TEMP = � should be within �E0 - EF�, �F0 - FF�, �00 0F�, �10 - 1F� and �20 - 2F�.
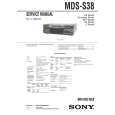
5-6. LASER PPOWER ADJUSTMENT
Connection :
Laser power meter
Optical pick-up objective lens Digital volt meter
BD board CN110 pin 5 (I+3V) CN110 pin 4 (IOP)
Adjusting Method : 1. Set the laser power meter on the objective lens of the optical pick-up. (When it cannot be set properly, press the 0 button or ) button to move the optical pick-up.) Connect the digital volt meter to CN110 pin 5 (I+3V) and CN110 pin 4 (IOP). 2. Rotate the AMS knob and display �LDPWR ADJUST�. (Laser power : For adjustment) 3. Press the YES button once and display �LD 0.9 mW $ �. 4. Rotate the AMS knob so that the reading of the laser power meter becomes 0.86 to 0.92 mW. Press the YES button after setting the range knob of the laser power meter, and save the adjustment results. (�LD SAVE $ � will be displayed for a moment.) 5. Then �LD 7.0 mW $ � will be displayed. 6. Rotate the AMS knob so that the reading of the laser power meter becomes 6.9 to 7.1 mW, press the YES button and save it. Note : Do not perform the emission with 7.0 mW more than 15 seconds continuously. 7. Then, rotate the AMS knob and display �LDPWR CHECK�. 8. Press the YES button once and display �LD 0.9 mW $ �. Check that the reading of the laser power meter become 0.85 to 0.91 mW. 9. Press the YES button once more and display �LD 7.0 mW $ �. Check that the reading the laser power meter and digital volt meter satisfy the specified value. Specified Value : Laser power meter reading : 7.0 ± 0.1 mW Digital voltmeter reading : Optical pick-up displayed value ± 10% (Optical pick-up label)
KMS
27X40 B0825
Iop = 82.5 mA in this case Iop (mA) = Digital voltmeter reading (mV)/1 (�)
10. Press the NO button and display �LDPWR CHECK� and stop the laser emission. (The NO button is effective at all times to stop the laser emission.)
N
260A
� 32 �
 $4.99 MDSS38 SONY
Service Manual Complete service manual in digital format (PDF File). Service manuals usually contains circuit diagr…
|
|
|
> |
|