|
There are currently no product reviews.
 ;
When I purchased this manual I had my doubts regarding the quality as the price was so reasonable as compared to other outlets.
The manual itself is of high standard the print is very clear as are the diagrams. Obviously with the diagrams one has to zoom in otherwise it is to small to be able to read.
Overall I am very pleased with the company who delivered as they said and with the manual they supplied.
I occasionally require a manual and now having registered with this company I shall order from them in the future.
;
I was at first dubious about payiong for downloaded manuals but having done so, I was extremely impressed with quality of the two manual I ordered, well worth the small price I paid.
I would highly recommend these to my friends.
;
reasonable price for the schematic - the service is perfect, all as expected and pointed by instructions - good scan of the original plans - thank you!
;
Manual was just as described!!! I odered it and in less than a day was able to download it and the text was clear and pages were all complete just as the original manual was. Purcashed this for a friend and they were more than happy. Perfect all around!
 ;
Excellent service and prompt delivery. But it's not a manual - only 4 pages wiring diagrams.
Thanks.
SECTION 1 GENERAL
Location of controls
This section is extracted from instruction manual.
Setting the clock
The clock uses a 24-hour digital indication. Example: To set the clock to 10:08
1
D I SC +
-P
R
S
PTY
DSPL LIST
OPEN D-BASS TA
AF
Press (MENU), then press either side of (DISC/PRST) repeatedly until �CLOCK� appears.
MENU
T +
SOURCE SOUND
P RS
-SEEK/AMS
ENTER
TREP SHUF
OFF
-
D IS C �
MODE
1
2
3
4
5
6
1 Press (ENTER).
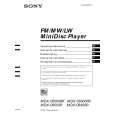
MDX-C6500RX/C6500R /C6400R
The hour indication flashes.
Refer to the pages listed for details. 1 Volume control dial 19 2 MENU button 8, 10, 12, 13, 14, 15, 16, 18, 19, 21, 24 3 DISC/PRST +/� (cursor up/down) buttons 8, 10, 12, 13, 14, 15, 16, 18, 19, 20, 21, 24 During CD/MD playback: Disc change 10, 13 During radio reception: Preset stations select 16 4 Z (eject) button (located on the front side of the unit behind the front panel) 9 5 DSPL/PTY (display mode change/ programme type) button 9, 10, 12, 17, 20 6 LIST button 12 List-up 13 7 SOURCE (TUNER/CD/MD) button 8, 9, 10, 13, 15, 16, 19 8 Display window 9 OPEN button 7, 9, 26 q; D-BASS button 25 qa SOUND button 23 qs Reset button (located on the front side of the unit behind the front panel) 7 qd OFF button* 7, 8, 9 * Warning when installing in a car without ACC (accessory) position on the ignition key switch Be sure to press (OFF) on the unit for two seconds to turn off the clock display after turning off the engine. When you press (OFF) only momentarily, the clock display does not turn off and this causes battery wear.
After the clock setting is completed, the display returns to normal play mode.
Tip You can set the clock automatically with the RDS feature (see page 17). Note In the initial setting, the clock indication appears while the unit is turned off. When the D.INFO mode is set to ON, the time is always displayed (page 24).
qf SEEK/AMS �/+ (cursor left/right) buttons 8, 10, 12, 14, 16, 18, 19, 21, 23, 24 Automatic Music Sensor 10, 14 Manual Search 10 Seek 15, 16, 18 qg ENTER button 8, 10, 12, 13, 14, 15, 16, 18, 19, 20, 21, 24 qh MODE button 19 During CD or MD playback: CD/MD unit select 9, 13 During radio reception: BAND select 15, 16 qj Receptor for the card remote commander qk Number buttons During radio reception: Preset number select 15, 16, 18, 19 During CD/MD playback: (1) REP 11 (2) SHUF 11 ql AF button 17, 18, 19 w; TA button 18, 19
2 Press either side of (DISC/PRST) to set the hour.
3 Press the (+) side of (SEEK/AMS).
The minute indication flashes. 4 Press either side of (DISC/PRST) to set the minute.
2
Press (ENTER).
The clock starts.
3
|