|
|
|
Categories
|
|
Information
|
|
Featured Product
|
|
|
 |
|
|
There are currently no product reviews.
 ;
Absolutely perfect! I've been trying to understand how to use all or at least some of the features of the receiver and especially the remote.
;
Copy of genuine owners/operators manual, very useful
;
The manual was a perfect match and was exactly what I was looking for. I'm very satisfied with my purchase.
;
Thank you for having the manual I needed for an older model Aiwa stero I had found on Ebay --- I wanted the Aiwa because I had tapes and cd's but I did not have a manual as to how to operate the system... I found what I needed and it has enabled me to set the system up for my enjoyment.
;
I wished detailed information of the JBL S310 and here I found it! Very happy with the service from this site!
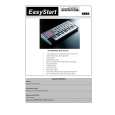
Operation�Quick Start
Step 12. Press the OCTAVE SHIFT/CURSOR [®] key. The name select page will appear. Since this is the last page of the encoder assignments, the OCTAVE SHIFT/CURSOR [®] key will light red,
13
4. Saving a scene
If you don�t save your edited controller assignments, your changes will be lost when you select a different scene or turn off the power. Here�s how to save your controller assignments in a new scene so you won�t have to recreate them later. You use Scene mode to save scenes. (�p.54) Steps 1-2. Hold down the [SCENE] key and press the pad marked WRITE. You will enter the WRITE page. In this example, let�s save your assignments to scene 2.
and the [ENTER] key will blink. Step 13. Use the [VALUE] knob to select a name. For a list of the available names, refer to �Parameter Name (Encoder/Slider)� on the separate lea�et. Turn encoder 2 to choose a name for encoder 2.
12
Step 14. When you have made your selection, press the [ENTER] key to �nalize the setting.You will then return to Play mode. If you press the [ENTER] key in one of the preceding pages, the settings will be updated to the assignments you made up to that point.
1
If you assign an RPN or NRPN message, the page structure will be different. (�p.26) Go ahead and make settings for other controllers as well, to create your scene. (For more about assigning other controllers, �p.24 �Setting mode�)
2
Quick Assign
If you just want to set the control change number for an encoder or slider, here�s a simpler way to make the assignment. Hold down the [SETTINGS] key and operate the encoder or slider you want to assign. The sub-display will change to show the MIDI message you select. When you release the [SETTING] key, the assignment will be updated and you will return to Play mode.
3 3
Step 3. Either press the pad in which you want to store the scene, or use the [VALUE] dial to select the scene number. Step 4. After you have made your selection, press the OCTAVE SHIFT/CURSOR [®] key to move to the next page.
4
17
Quick Start
14
|
|
|
> |
|