|
|
|
Categories
|
|
Information
|
|
Featured Product
|
|
|
 |
|
|
There are currently no product reviews.
 ;
Bought T4850 High End Tuner a few years ago, but i didn't know where all the buttons were used for. So i purchased the owners manual. Perfect! Just what i needed.
;
Bought the used Philips car-radio. No manual! Found on this site a copy of the orginal English manual. I am very happy with it. Now I know how to setup and use my "new" car-radio.
Recommended site for everybody looking for a manual for (older) products!
;
Great deal, you are the only one on earth who could deliver this old manual. Thx so much and have nice chrismas
 ;
Everything is OK. Owner's Manual I downloaded ( I get link for it by email).
;
The only reason I gave this less than 4 stars, is because it shouldn't take 24 hrs to have the download available. I was surprised to find that I had to wait until the next day to be able to download the manual that I paid for.
The manual itself is the correct manual.
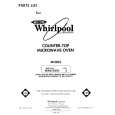
M-LEVEL
COOKING
RACK
Use the Bi-Level Cooking Rack when cooking in more than one container The rack can be turned upsrde-down to help fit taller containers on the bottom of the oven. See the MICRO MENUS� Cookbook provided with your oven
\
J
Second Position: Turn rack upside-down when using a taller container on the bottom of the oven.
First Position: Use the rack only when heatrng more than one contarner of food. Do not let a container touch the top of the oven.
._~~__ CLEANING
l
THE RACK
SPECIAL CAUTIONS
l
l
Wash by hand with a mrld detergent cr In vour drshwasher. Do not use abrasive scrubbers or cleansers.
Do not use with browning dish. Use only when cooking foods in more than one container. l Use only in the microwave oven. l Do not let food or containertouch the top of the oven. o Do not store rack in the oven. 0 Put food in containers, then place containers on rack. 0 Do not cook foods directly on rack without putting them in containers first.
l
REPLACING
1.
Unplug 2. Remove holdtng access panel
THE LIGHT BULB
cord screw on
the power
3. Remove tne light bulb from its sot ket. 4. Replace bulb with a 40. watt appliance bulb. 5. Replace the access panel and holding screw. 6. Plug In the power cord
18
-Tmk
|
|
|
> |
|