|
|
|
Categories
|
|
Information
|
|
Featured Product
|
|
|
 |
|
|
There are currently no product reviews.
 ;
Very very good as usual very trustable site. Perfect!!!!!!
;
The Service Manual received was helpful. Good copy of original document.. I recomend all of my friends about this technical page.
;
Perfect, complete manual, exactly what I needed. Recommended to everyone.
;
Very usefull manual. From my point of view there are needs more clearables images.
;
Once again owner-manual.com has saved the day for me, and come through with the manual I need. I looked other places too, and couldn't find it anywhere. Thank You owner-manual.com!!! You're the BEST!
MX-GT80/MXGT90 Removing the tuner board (See Fig.11 and 12)
Prior to performing the following procedure, remove the metal cover and the CD changer mechanism assembly. 1. Disconnect the card wire from connector CN1 on the antenna board on the right side of the body. 2. Remove the plastic rivet fixing the antenna board. 3. Remove the two screws F on the back of the body. Fig.11
Plastic rivet Tuner board Rear panel
CN1
G F
Removing the rear cover / rear panel (See Fig.12 to 15)
Prior to performing the following procedure, remove the metal cover and the CD changer mechanism assembly. 1. Remove the screw G attaching the rear cover on the back of the body. 2. Push each tab of the four joints b in the direction of the arrow and release. 3. Remove the eleven screws F panel. attaching the rear
Rear cover Joint b
Rear panel
Joint b
Fig.12
Rear panel
4. Release the joints c on each lower side of the rear panel using a screwdriver and remove the rear panel backward. Note : Remove the tuner board in case of necessity. (Refer to Fig.21)
F F F F
Fig.13
Joint c
Rear panel
Rear panel
Joint c
Fig.15
Fig.14
1-9
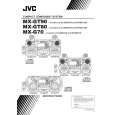 $4.99 MX-GT80 JVC
Owner's Manual Complete owner's manual in digital format. The manual will be available for download as PDF file aft…  $4.99 MX-GT80 JVC
Parts Catalog Parts Catalog only. It's available in PDF format. Useful, if Your equipment is broken and You need t…
|
|
|
> |
|