|
There are currently no product reviews.
 ;
One address for rare manuals.Very good copy. Thank you.
Your
Klaus Husse
;
All ok. I pay 5 $ and now i have 92 pages of good scaned service manual for my oooooold akai. Now i will try to repair it.
;
good and ok, very nice , good and ok, very nice, good and ok, very nice
;
Super manual it contains all the things you need to service your Marantz 2100.
;
A very easy to understand and use manual. Well worth the money.
MX-GT80/MXGT90 Removing the tuner board (See Fig.11 and 12)
Prior to performing the following procedure, remove the metal cover and the CD changer mechanism assembly. 1. Disconnect the card wire from connector CN1 on the antenna board on the right side of the body. 2. Remove the plastic rivet fixing the antenna board. 3. Remove the two screws F on the back of the body. Fig.11
Plastic rivet Tuner board Rear panel
CN1
G F
Removing the rear cover / rear panel (See Fig.12 to 15)
Prior to performing the following procedure, remove the metal cover and the CD changer mechanism assembly. 1. Remove the screw G attaching the rear cover on the back of the body. 2. Push each tab of the four joints b in the direction of the arrow and release. 3. Remove the eleven screws F panel. attaching the rear
Rear cover Joint b
Rear panel
Joint b
Fig.12
Rear panel
4. Release the joints c on each lower side of the rear panel using a screwdriver and remove the rear panel backward. Note : Remove the tuner board in case of necessity. (Refer to Fig.21)
F F F F
Fig.13
Joint c
Rear panel
Rear panel
Joint c
Fig.15
Fig.14
1-9
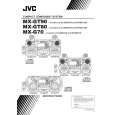 $4.99 MX-GT90 JVC
Owner's Manual Complete owner's manual in digital format. The manual will be available for download as PDF file aft…  $4.99 MX-GT90 JVC
Parts Catalog Parts Catalog only. It's available in PDF format. Useful, if Your equipment is broken and You need t…
|