|
|
|
Categories
|
|
Information
|
|
Featured Product
|
|
|
 |
|
|
There are currently no product reviews.
 ;
Good,readable manual. I found other manuals that were not readable when it came to part ID, but the one downloaded from owner-manual.com was better than expected. I will do buisness with owner-manual.com again.
;
Service Manual that I received was very helpful to me. Thank you.
;
The manual is well organized and is easy to read. The chapters are following normal way to proceed.
;
This scanned manual is well done in that most all the pages except for one is straight and clear- the way I would do them. One page was upside down but that happens. For the money that is charged on this site you get a pretty good deal. Now with complex repairs, I still prefer to us paper manuals which I have to buy at stereomanuals but the one I got here was much less than the $45 he was charging but this is a larger than normal manual for three different units. I am a picky manual user because I have used original manuals from Sony and Teac.
;
Very useful service manual, was exactly what i needed.Good quality,reasonable price.Thank you.
MZ-G750/R700
This set LCD display
0D5E04
04: Adjusted value
0 23
24. Press the X key. (0D65 is blinking) 25. Press the [VOL+] key once to change the blinking portion to 0D66.
This set LCD display
12. Press the X key. (0D5E is blinking) 13. Press the [VOL+] key to change the blinking portion to 0D61.
This set LCD display
0D6600
00: Adjusted value
0 23
0D6100
00: Adjusted value
0 23
26. Press the x key. (00 is blinking) 27. Adjust with the [VOL+] key (adjusted value up) or [VOL--] key (adjusted value down) so that the adjusted value becomes 03.
This set LCD display
14. Press the x key. (00 is blinking) 15. Adjust with the [VOL+] key (adjusted value up) or [VOL--] key (adjusted value down) so that the adjusted value becomes 20.
This set LCD display
0D6603
03: Adjusted value
0 23
0D6120
20: Adjusted value
0 23
28. Press the X key. (0D66 is blinking) 29. Press the [VOL+] key to change the blinking portion to 0D68.
This set LCD display
16. Press the X key. (0D61 is blinking) 17. Press the [VOL+] key to change the blinking portion to 0D64.
This set LCD display
0D6800
00: Adjusted value
0 23
0D6400
00: Adjusted value
0 23
30. Press the x key. (00 is blinking) 31. Adjust with the [VOL+] key (adjusted value up) or [VOL--] key (adjusted value down) so that the adjusted value becomes 80.
This set LCD display
18. Press the x key. (00 is blinking) 19. Adjust with the [VOL+] key (adjusted value up) or [VOL--] key (adjusted value down) so that the adjusted value becomes F4.
This set LCD display
0D6880
80: Adjusted value
0 23
0D64F4
F4: Adjusted value
0 23
32. Press the X key. (0D68 is blinking) 33. Press the [VOL+] key once to change the blinking portion to 0D69.
This set LCD display
20. Press the X key. (0D64 is blinking) 21. Press the [VOL+] key once to change the blinking portion to 0D65.
This set LCD display
0D6900
00: Adjusted value
0 23
0D6500
00: Adjusted value
0 23
34. Press the x key. (00 is blinking) 35. Adjust with the [VOL+] key (adjusted value up) or [VOL--] key (adjusted value down) so that the adjusted value becomes 09.
This set LCD display
22. Press the x key. (00 is blinking) 23. Adjust with the [VOL+] key (adjusted value up) or [VOL--] key (adjusted value down) so that the adjusted value becomes 1C.
This set LCD display
0D6909
09: Adjusted value
0 23
0D651C
1C: Adjusted value
0 23
26
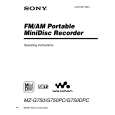 $4.99 MZG750 SONY
Owner's Manual Complete owner's manual in digital format. The manual will be available for download as PDF file aft…
|
|
|
> |
|