|
|
|
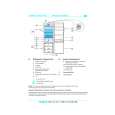
Categories
|
|
Information
|
|
Featured Product
|
|
|
 |
|
|
There are currently no product reviews.
 ;
Excellent service manual, i didn't believe i could find it for such old product, it is very explanatory, managed to fix the disk player!!!
 ;
Nice manual. Clear copy and very rare, to boot. Great price, too!
;
Excellent service manual. Complete service info. with schematics, step-by-step instructions and illustrations. Well worth the price!
;
Great product, helped me to restore vintage walkman cassette.
Just some pictures could be little bit more sharp and contrast
Thank you
;
I love older radio's and the service manuals that are sometimes hard to find. Was able to find a manual quite easily on this site.
1-7. OHB Fixing Tool
1-7. OHB Fixing Tool
OHB fixing tool (Sony P/N J-6395-100-A) is separately available to adjust the PA board of the OHB for a portable camera. How to Use 1. Install a tripod adaptor VCT-14 on the OHB fixing tool with the two screws, using the supplied allen wrench (width across flats: 3/16). n Tighten in order of 1 to 2 .
4. Secure the OHB to the OHB fixing tool with the four screws.
VCT-14
5. Attach the camera to the tripod adaptor. 6. Connect the cables to the OHB referring to the operation manual. n The tripod adaptor can slide to and fro. Align to a proper position when connecting between the OHB and camera, or adjusting the PA board.
(VCT-14 bottom view)
m . The OHB fixing tool with the camera installed can be mounted on a tripod with an 1/4 -inch or 3/8-inch screw. . If removing the spacer shown in the figure, you can fix the tripod adaptor to the OHB fixing tool. In this case, the tripod adaptor can not slide.
2
1
2. Remove the right side panel of the camera. Loosen the four screws and pull out the OHB from the camera. Disconnect the three cables from the OHB. 3. Remove the DR cover. (Refer to Section 1-2.)
Spacer
1-8 (E)
OHB-400/500/500WS & PAL OHB-450/451/550/550WS & PAL
|
|
|
> |
|