|
|
|
Categories
|
|
Information
|
|
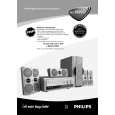
Featured Product
|
|
|
 |
|
|
There are currently no product reviews.
 ;
This manual was exactly what I needed. Detailed, useful and delivered as promised.
 ;
Great manual good quality really helped in the repair of my Toshiba, thanks
;
Print was clear and easy to read. Thank you Joe joeoldaudio
;
Very great deal. In a few minutes a have the manual, that I needed. Thanl you very much
;
Manual was complete. Received it quickly. No problems
5
6
7
8
7.1.9 DISASSEMBLY
1 Rear Case (43P) and Front Case Assy (43P)
1 2
Remove the ten screws. Remove the 25 screws. �1: When reassembling, first secure the screws for these holes to position the Rear Case (43P) correctly. Rear Case (43P)
A
1 (Secure this screw first.) 2 12 2 2 1
3 4
Remove the Rear Case (43P). Remove the screw.
2 1
2
21
2 1 2 2 1 2 2 21 4 2 2 2 2 2 2
�1 �1
2 2 2 1 12 2 2 1 2
B
When reassembling the Front Case Assy (43P) Secure the screws in the order of ~ and Ÿ. Then secure the screws on the upper side, the sides, then the lower side.
3
C
5 6
Remove the flexible cable on the PANEL KEY Assy. Remove the Front Case Assy (43P).
6 -2
Note: If you wish to remove only the Front Case Assy, you can remove it in the order of 1, 4, 5, and 6.
D
6 -1
Front Case Assy (43P)
E
5
PANEL KEY Assy
F
PDP-435PE
5 6 7 8
71
|
|
|
> |
|