|
|
|
Categories
|
|
Information
|
|
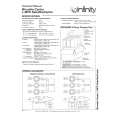
Featured Product
|
|
|
 |
|
|
There are currently no product reviews.
 ;
This was a very hard to find manual. The unit is long discontinued and Pioneer doesn't retain every manual for every model. Thanks owner's-manual.com!
 ;
I'm so glad I was able to find a site to download my missing manuals. Very reasonable prices and they kept me informed about the process and I had my manual within less than a day. The only thing I wish was an option is a 100% English version with no spanish or anything. But overall great site.
;
The manual is complete with excellent quality! One suggestion, show number of pages and weather it is multi-lingual. The AD 600 Manuel is about 76 pages and over half is non English. This results in a larger print job than usually needed. Having this information, one could select the desired pages for printing.
;
I've been looking for a copy of the original user/owner manual. Just what the doctor ordered, thank you.
;
the manual was very helpful thank you very much no one else was able to help me thanx
Deutsch
Bei Verwendung der Wandbefestigungseinheit:
Bringen Sie zunächst nur die Lautsprecher-Befestigungsteile an und schlie�en Sie die Lautsprecherkabel an, bevor Sie das Plasma-Display an der Wand installieren. Befestigen Sie den Lautsprecher erst danach am Plasma-Display (siehe Seite 16). Um die Verkabelung zu erleichtern, empfiehlt es sich, zunächst die Kabel an den Seiten des Plasma-Displays anzuschlie�en, bevor der Lautsprecher am Plasma-Display befestigt wird.
VORSICHT
Gehen Sie bei Installation und Anschlie�en sorgsam vor, damit Sie sich nicht an den Lautsprecher-Befestigungsteilen verletzen.
3. Schlie�en Sie die mitgelieferten Lautsprecherkabel an die Lautsprecherklemmen an der Rückwand des Plasma-Displays an. 4. Platzieren Sie das Plasma-Display auf den Befestigungsteilen der Wandbefestigungseinheit.
� Einzelheiten hierzu finden Sie in der Bedienungsanleitung der Wandbefestigungseinheit.
5. Schlie�en Sie das andere Ende jedes Lautsprecherkabels an den Lautsprecher an. 6. Platzieren Sie den Lautsprecher mit der korrekten Ausrichtung auf den Lautsprecher-Befestigungsteilen.
4
LautsprecherBefestigungsschraube (M5 x 10 mm)
LautsprecherBefestigungsschraube (M5 x 10 mm)
2
1
3
Bei Verwendung der Wandbefestigungseinheit sind diese Löcher nicht zu benutzen.
LautsprecherBefestigungsschraube (M5 x 10 mm)
7. Ziehen Sie die mitgelieferten Schrauben (an 4 Stellen) an.
� Ziehen Sie die vier Schrauben in der numerischen Reihenfolge 1, 2, 3 und 4 der Abbildung an.
19
Deutsch
|
|
|
> |
|